Inventory #4 – April

During April, I made the most progress of any month so far in this challenge. Not coincidentally, this was also the month that I defended my Ph.D. dissertation – I was doing a lot of knitting to relieve stress! I completed several items, although as you’ll see, most of them were small. That’s kind of what you get when trying to knit through your stash – it’s time to get creative and figure out how to use up small quantities of yarn that aren’t enough for a whole hat/scarf/blanket/etc. The total quantity of yarn I used this month was 360 g, or 7.2% of the original amount.

My first completed item this month was the orange baby blanket I’ve been making steady progress on all year. I made a big push on this blanket during the first couple weeks of April, using up 220 g of yarn. I purchased the orange yarn (along with some reddish pink yarn) three years ago intending to use it for cute table decorations for my wedding…but then I realized that it’s crazy to try to make yarn-based centerpieces mere weeks before your wedding, with so many other details to manage! I already made another heart baby blanket with the other yarn, so I’m thinking it will be fun to use the two blankets for my future children, to remind us of how much fun we had at our wedding.

IMG_0410

Finished blanket just after blocking

IMG_0411

All folded up!

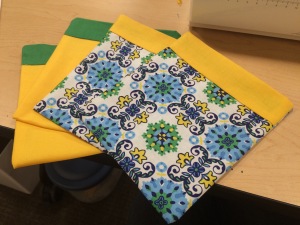
The rest of the items I made this month were all plaited headbands from my forthcoming pattern. I used up a lot of the Malabrigo remnants from past projects, and the result is very colorful. First, I refined the pattern I used for the purple headband featured in last month’s inventory to make three more like it (turquoise, pink, and green). Then I developed a wide version intended to cover the ears and made two of these (orange and yellow). Finally, I modified the original pattern to fit a child’s head (I hope!) in order to use a smaller quantity of yarn (red). The original and child’s patterns take 15-20 g of Malabrigo each, while the wide version takes about 30 g. (The turquoise one didn’t make it into the group picture because I already gave it away to my sister!)

_MG_4656

IMG_0422

Wide, regular, and child’s headbands

Overall, I’m happy with my progress this month. If I can maintain this pace for the rest of the year, I’ll be in really good shape for completing the stash challenge in a reasonable amount of time. Back to knitting!

Year-to-Date Statistics
  • 68 different yarns remaining
  • 4305 g remaining (86.1%)
  • 11 projects completed in 2015

Reversible Apron

For our anniversary last year, my husband bought me a beautiful new sewing machine (Singer Quantum Stylist 9960). I was so excited to start whipping up all kinds of clothes on the new machine, except then I realized that I didn’t really know how to sew. I mean, I can fix a hem and hand sew buttons, but the last time I made anything more complicated than that was a little letter Z pillow I sewed in 7th grade. (Letter Z – because I like to sleep…Zzzz…) So anyway, I’m basically a beginner.

IMG_1736

My amazing sewing machine

Fortunately, there was a beginning sewing class offered through the local recreation department during the month of March. I jumped on the opportunity to have someone walk me through a simple sewing project, and this class did not disappoint. Over the course of four sessions, we learned how to read a pattern, lay out and pin the pattern, cut out the pattern pieces, sew plain seams with proper seam allowance, turn narrow strips, design custom-sized pockets, and basic topstitching, all while creating a reversible apron.

The pattern we used in the class is the Simplicity 2691 apron pattern. The apron has a fixed-length neck strap, long waist ties, and one pocket on each side. The pockets and apron front have contrasting top bands.

IMG_0296

Laying out the neck strap

The first step was to lay out and pin the pattern pieces to the fabric. I selected three cotton fabrics for the apron:  green, yellow, and a green/yellow/white/blue multi pattern. This part took a really long time because I found it difficult to make sure the fabric stayed flat and smooth while I pinned the pattern to it. Also I’m a bit of a perfectionist, so that may have had something to do with it.

IMG_0297

Most of the pieces are cut out

Next I cut out all the pieces. I chose to make the main body of the apron in the multi pattern fabric on one side and the green fabric on the other, with yellow contrast on both sides. This part is pretty fun, because the feeling of cutting fabric with a really nice pair of fabric scissors is just satisfying. (Is that just me?) As a side note, I bought my scissors several years ago at Jo-Ann Fabrics with a 50% off coupon, so I splurged on a really nice pair, and it was totally worth it.

The first pieces I sewed were the neck strap and waist ties, which I made of the contrasting yellow fabric. These were pretty simple:  fold in half and sew around one end and the long edge, then turn inside out using a long dowel.

After the ties came the pockets. This was the one place where my teacher encouraged us to ditch the pattern and try making our own pockets. I opted for medium rectangular pockets, where the pattern had smaller pockets with rounded corners (which I assumed would be harder to sew). My pockets were designed to be double-thick, so I simply cut a rectangle of fabric that was the desired width and about twice the desired length.

IMG_0316

Getting ready to attach the pocket band

To sew each pocket, I first attached the pocket band by pinning the right sides together and simply sewing straight across the edge. Then I pressed the seam I just created toward the top of the pocket. I folded the long rectangular pocket piece in half with the right side in, then sewed around the two sides (the bottom was just a fold). Finally, I folded in and pressed the top edges (both front and back) and sewed a topstitch across. The pockets were now double-layered closed rectangles.

IMG_0317

Four finished pockets

The rest of the sewing went pretty fast. I stitched the pockets directly to each apron front with a topstitch around the two sides and the bottom of the pockets. I attached the top apron bands in the same way as the pocket bands. I pinned the two right sides of the apron together, inserting the ties and neck strap into proper position. I carefully sewed all the way around the edges of the main apron pieces, making sure that the ties and neck strap were correctly stitched into place and leaving the top edge open. Then I turned the apron right side out and folded under and pressed the top edges of the apron bands. Finally, I topstitched all the way around the edge of the apron, then did a final press. Here is the finished product:

IMG_0337    IMG_0341

I’m pretty happy with the way it turned out, especially for being the hardest sewing project I’ve done to date (sorry, Z pillow!) I was a little disappointed with how large the apron turned out, since I followed the size guide on the pattern in choosing which size to make. But it works just fine with the waist straps wrapped around in front like in the pictures. Also, my topstitching could use some serious work. The spacing from the edge is inconsistent and sometimes pretty wavy. Things to work on in my next project! Overall, I am proud that I made a cute, functional apron.