What I’m Working On: May 2021

Bodhi Leaf Washcloths

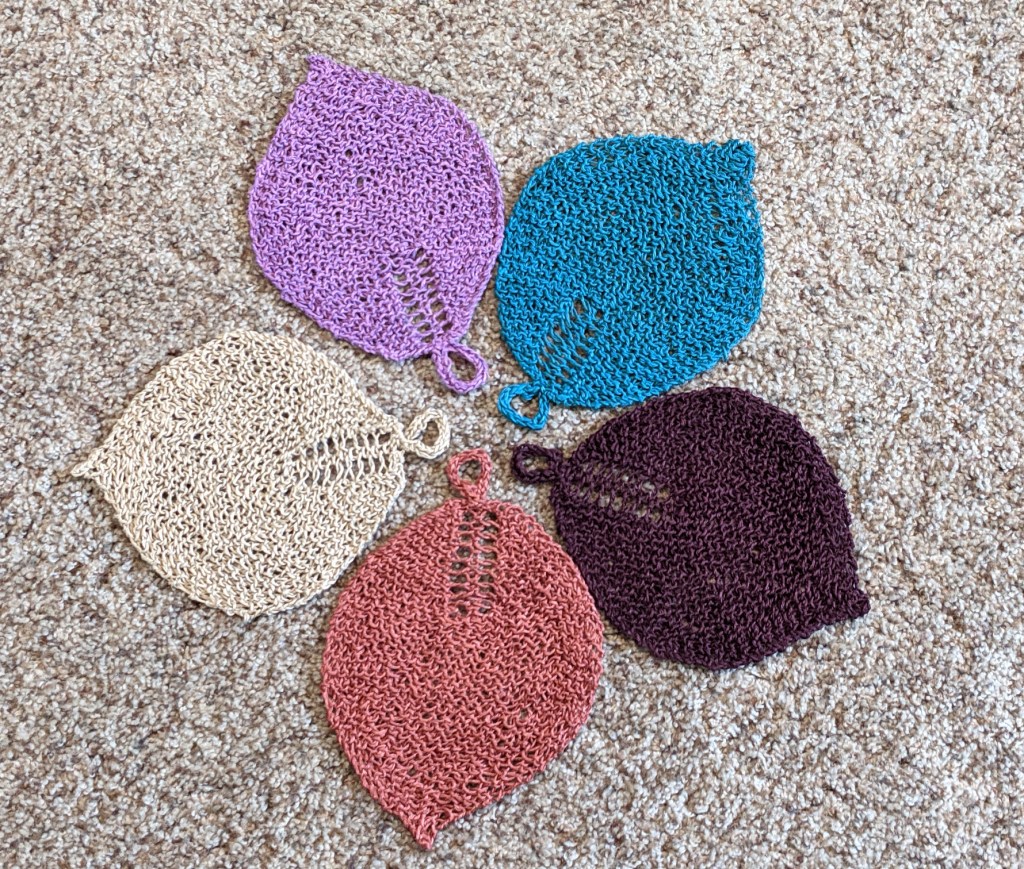
FINISHED – See my post here. These linen washcloths are addictive. I have made 15 so far and will definitely be making more.
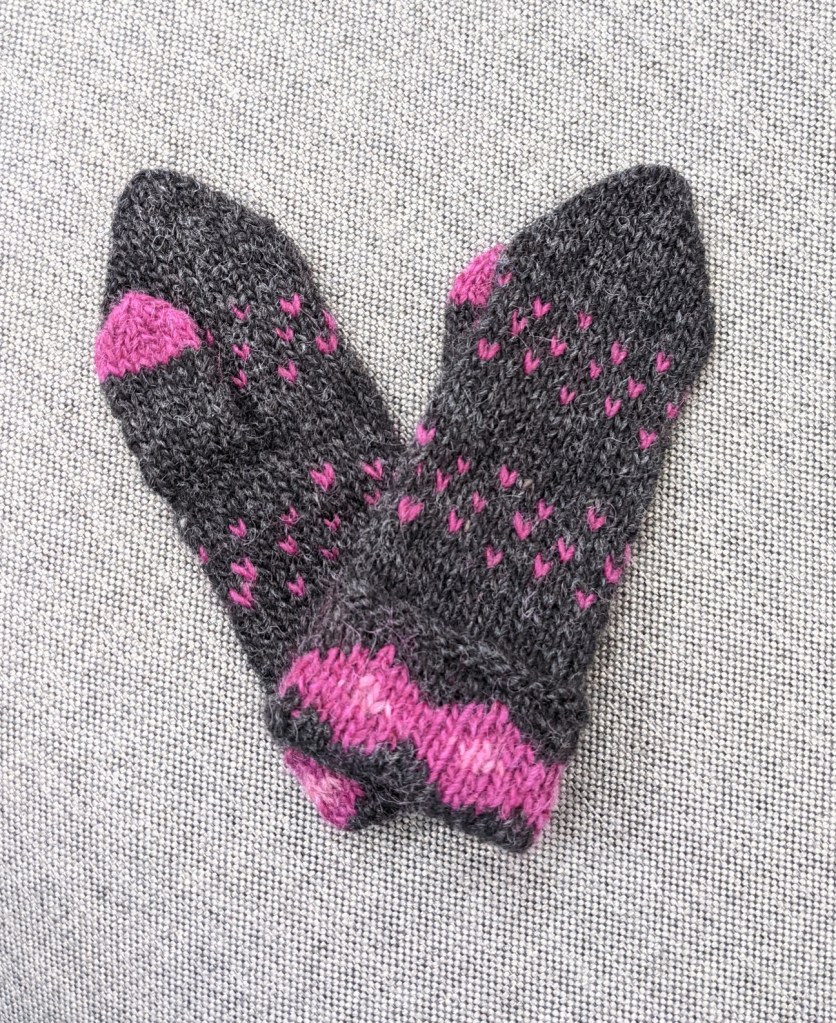
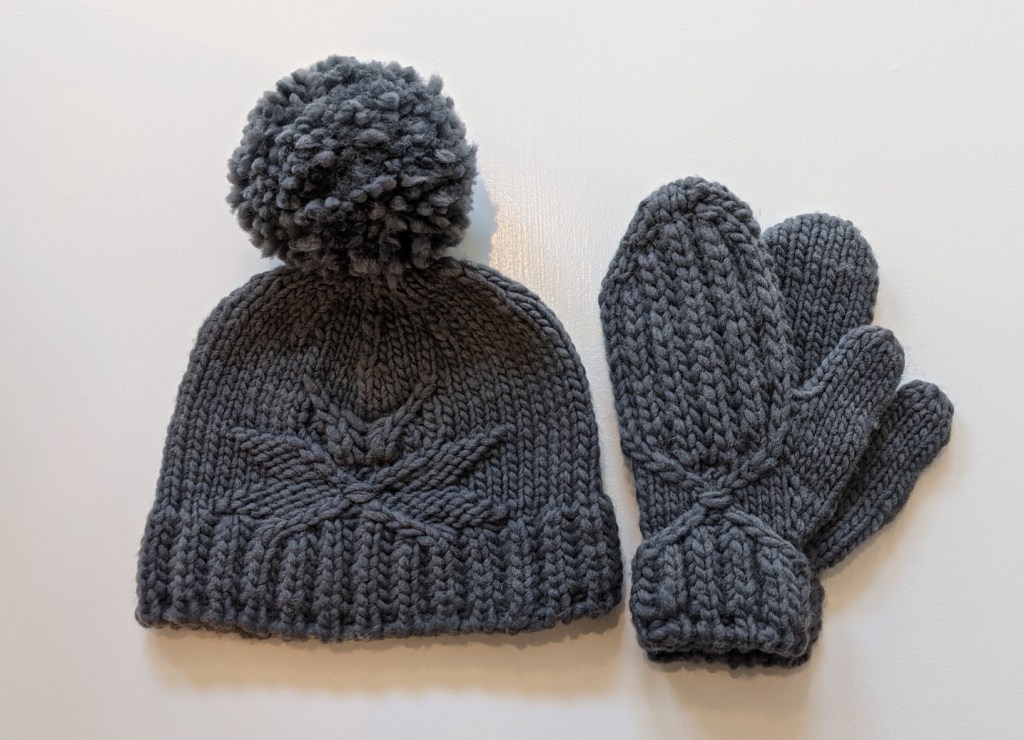
Isler Hat and Mitts

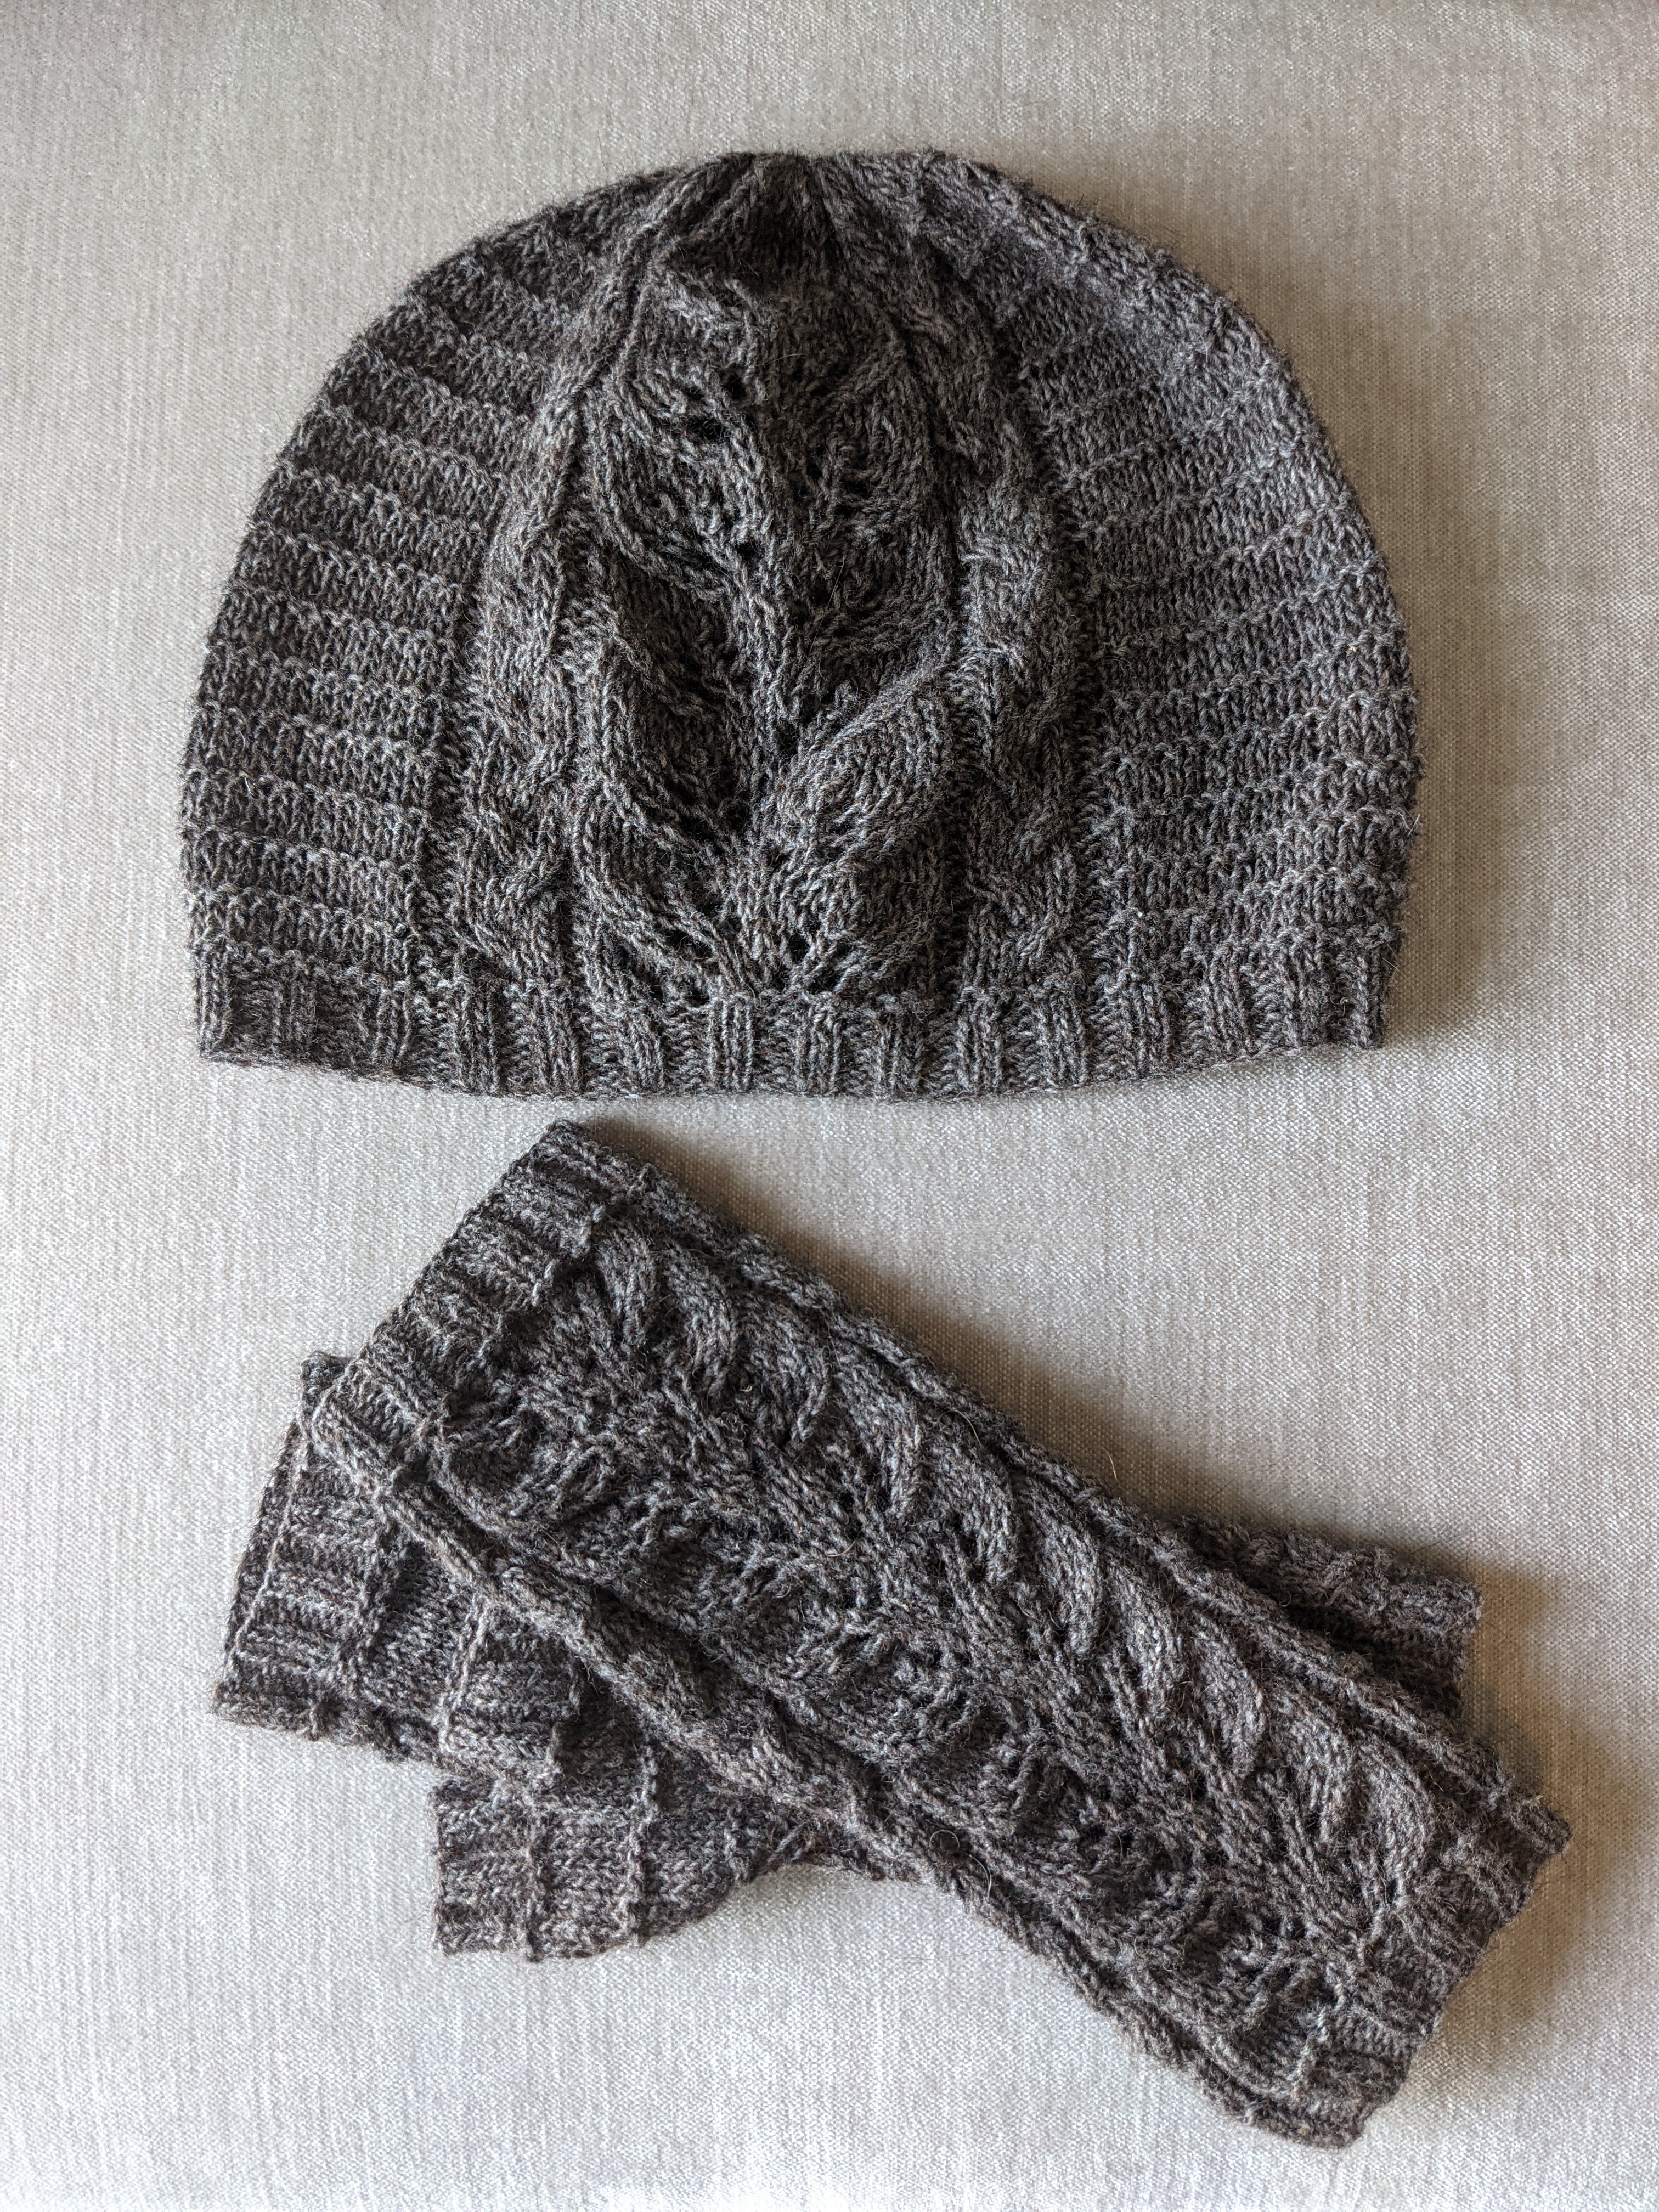
FINISHED – See my post here. This lightweight hat and mitts set is the perfect warmth for spring! It has been raining lately, so it was cool enough to wear these yesterday.
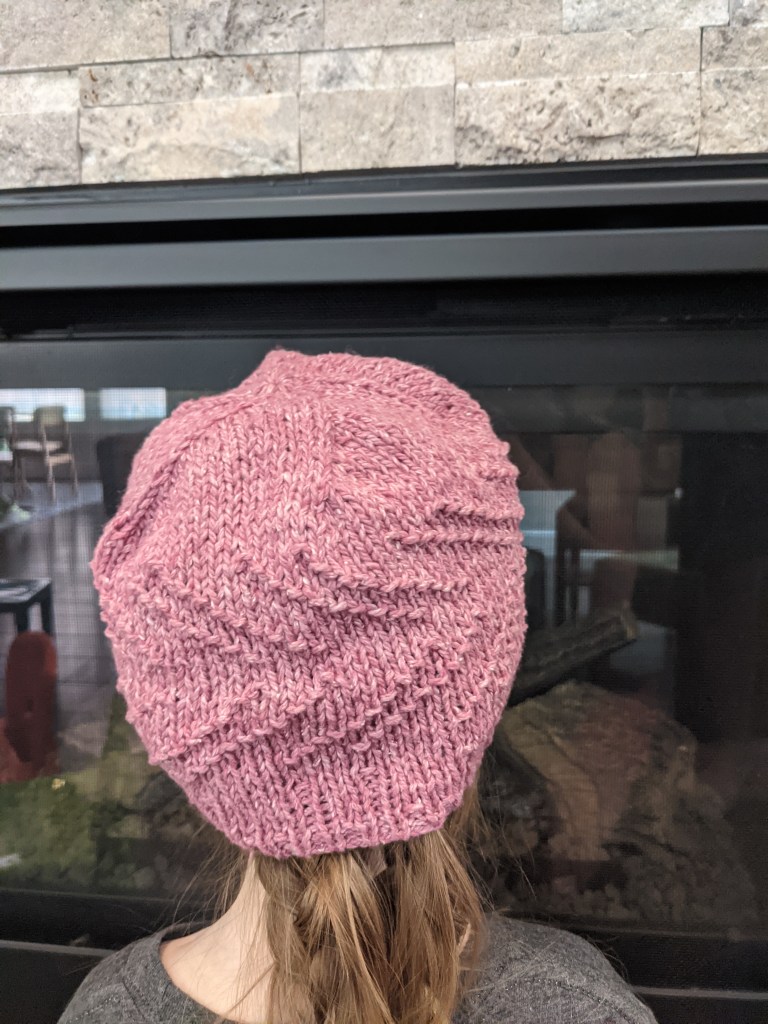
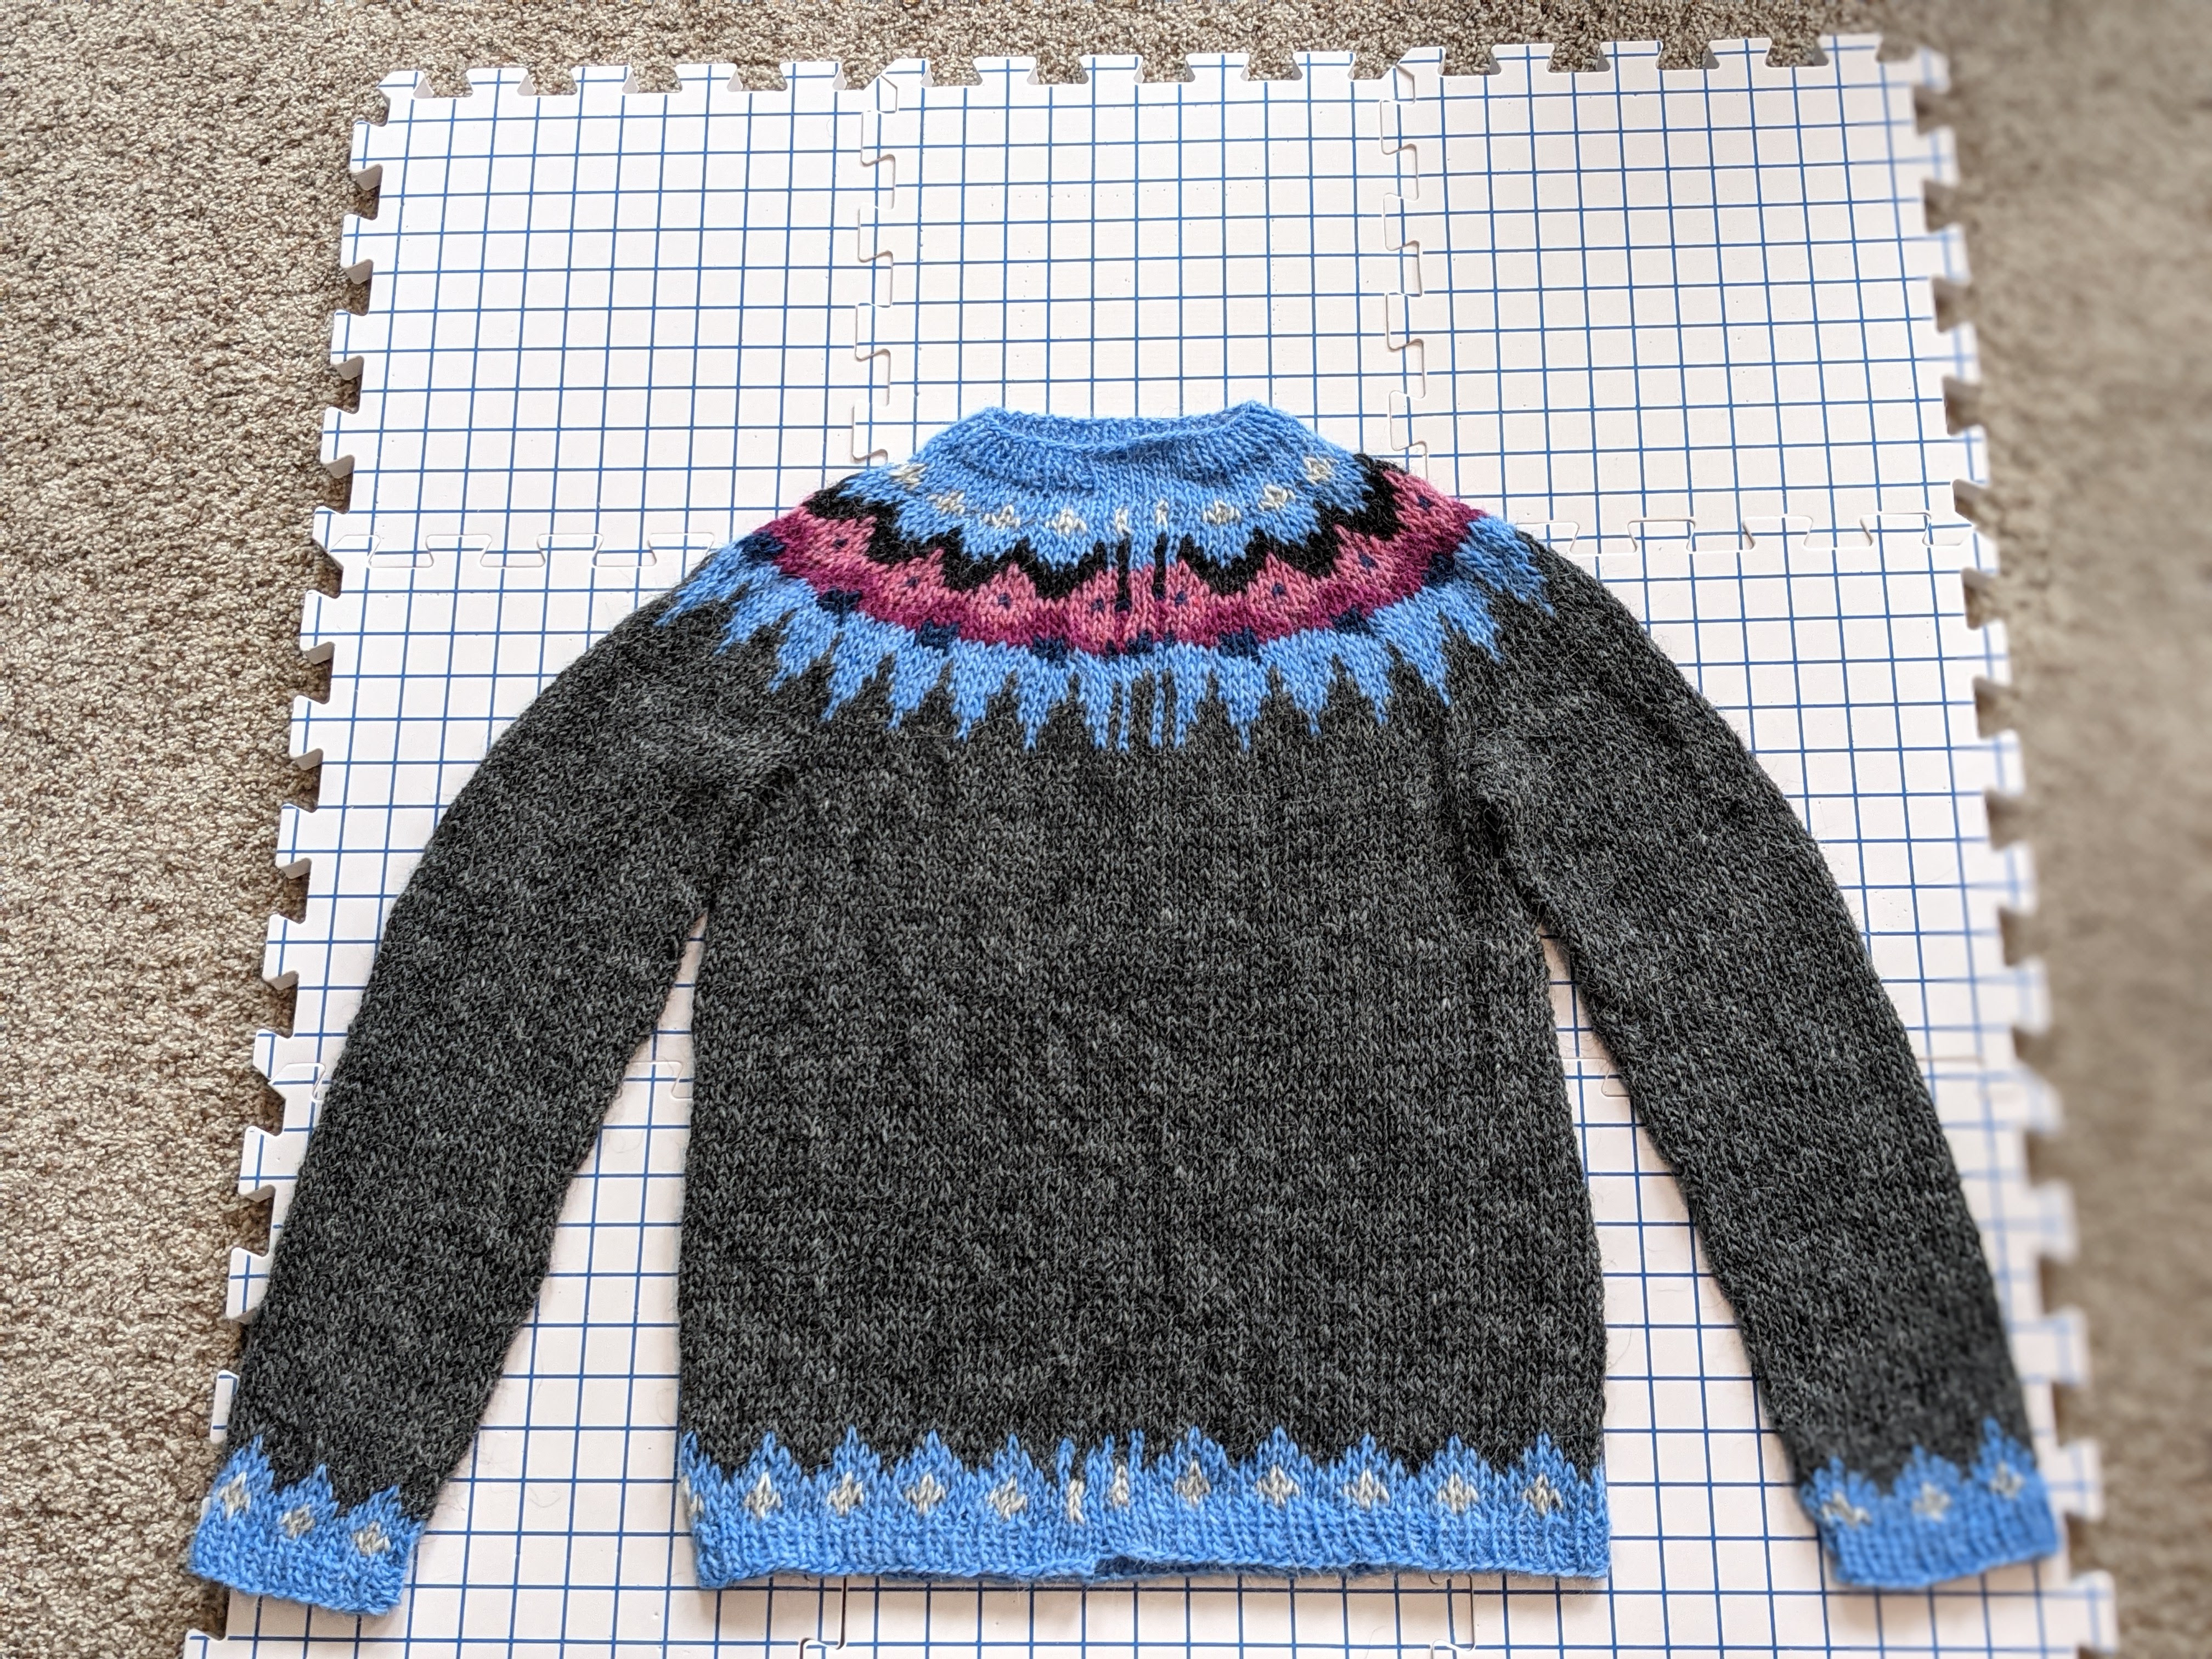
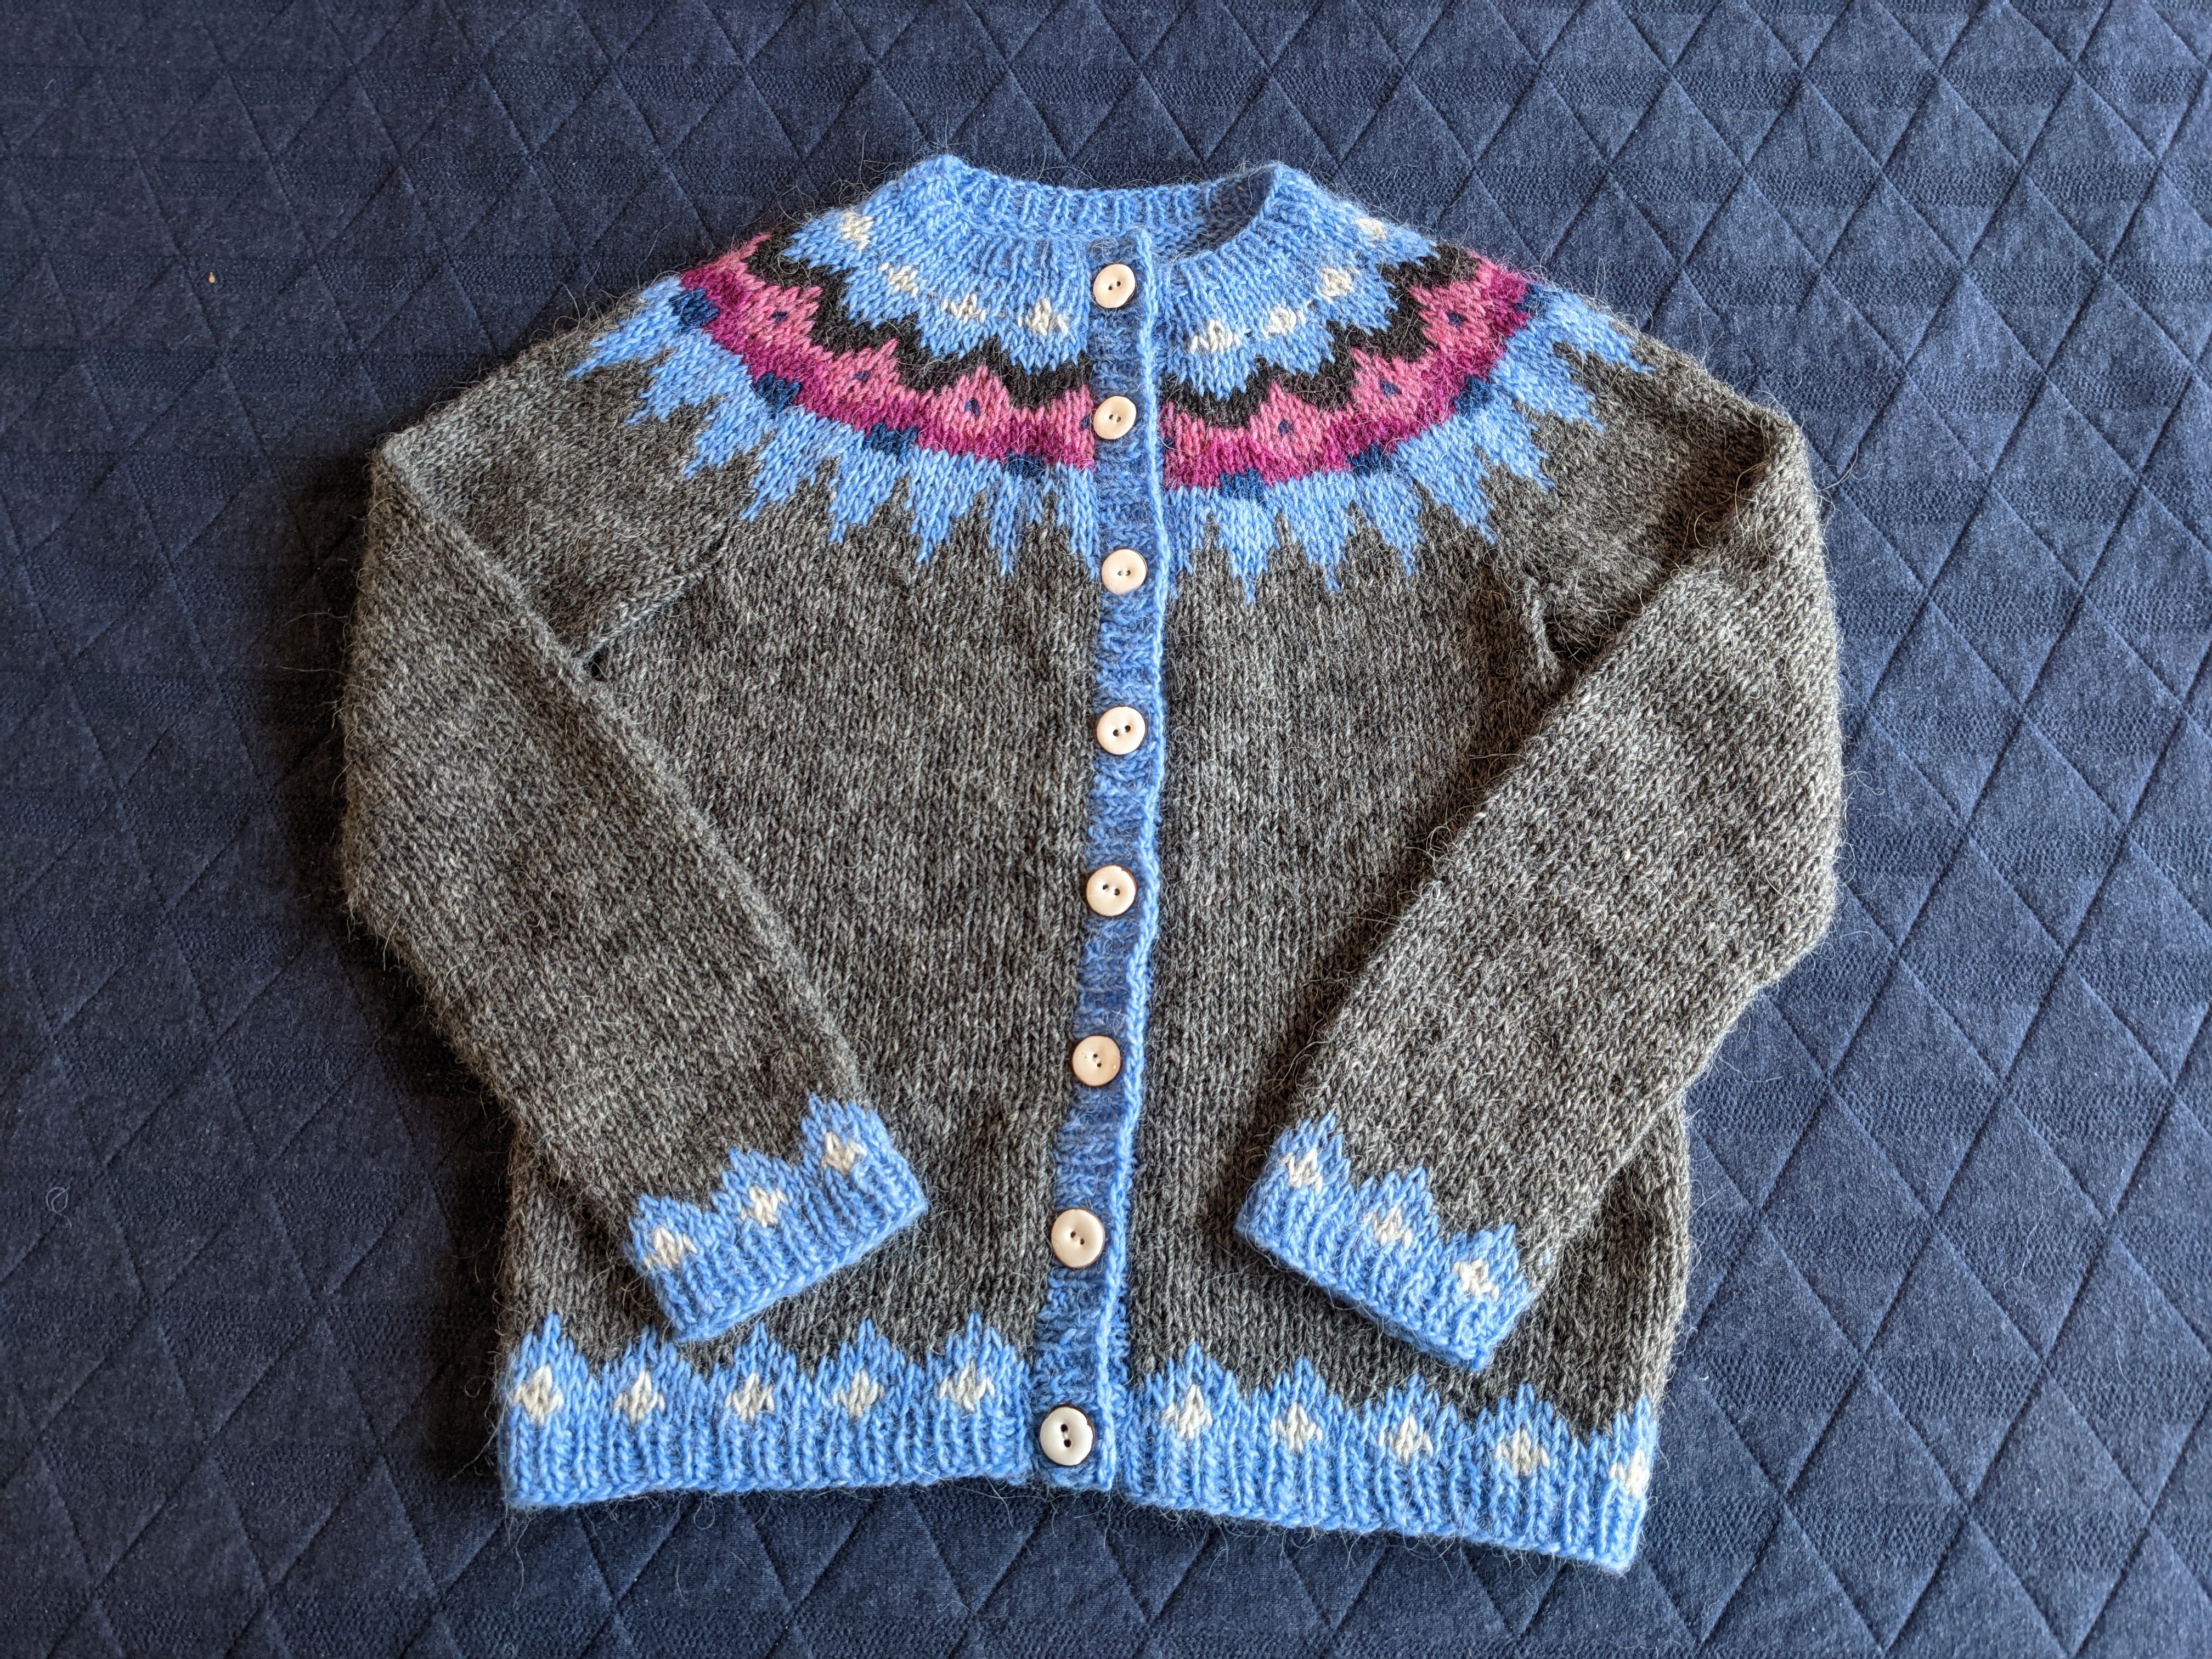
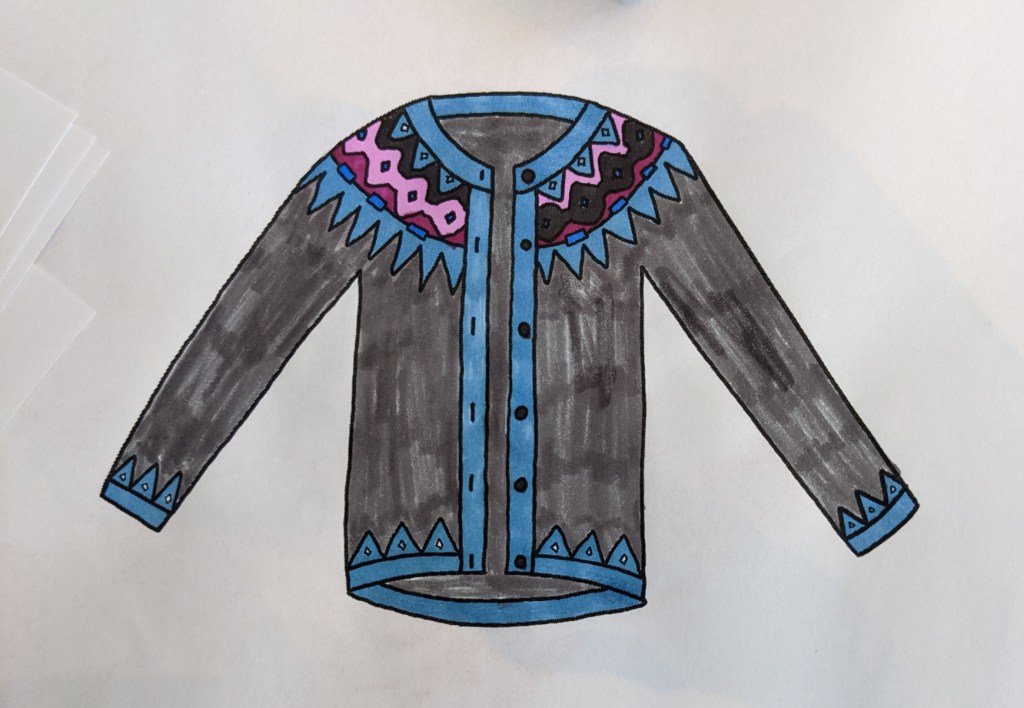
Mood Cardigan

IN PROGRESS – I’m about halfway done with this beautiful garment (pattern on Ravelry), which is from MDK Field Guide No. 15. It goes pretty fast because it mostly consists of two rectangles made with an easy to memorize lace pattern. It will really get interesting when I’m ready to assemble the pieces and finish it off! I’m using La Bien Aimee Helix yarn in the stunning dark pink Lise colorway.

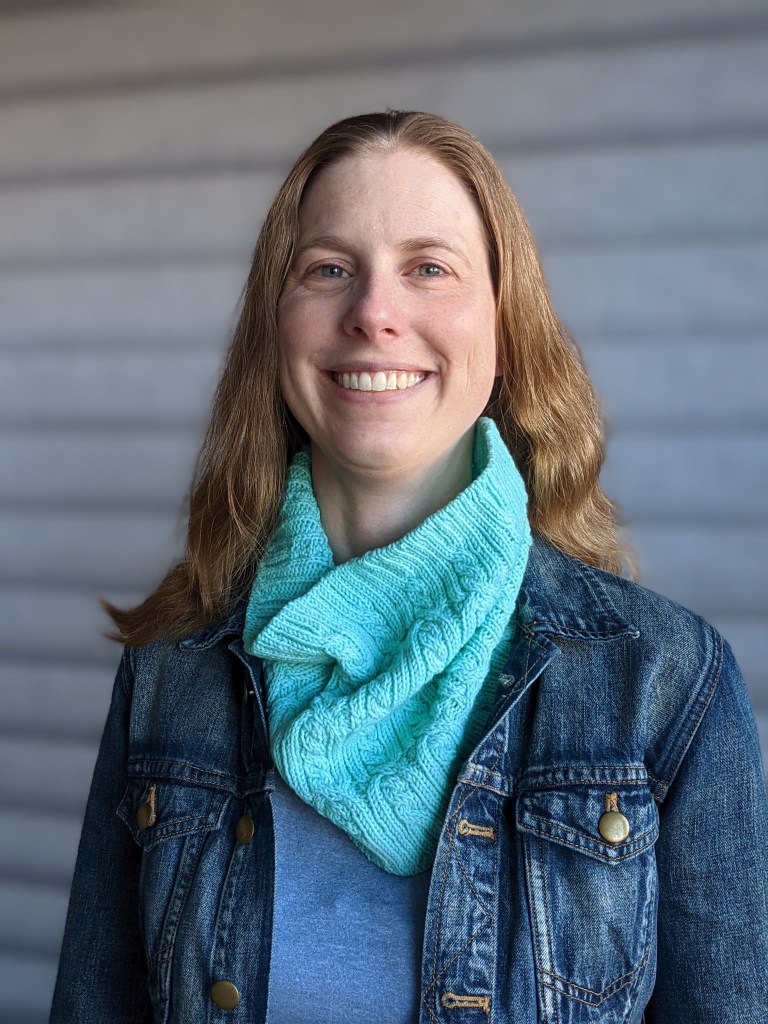
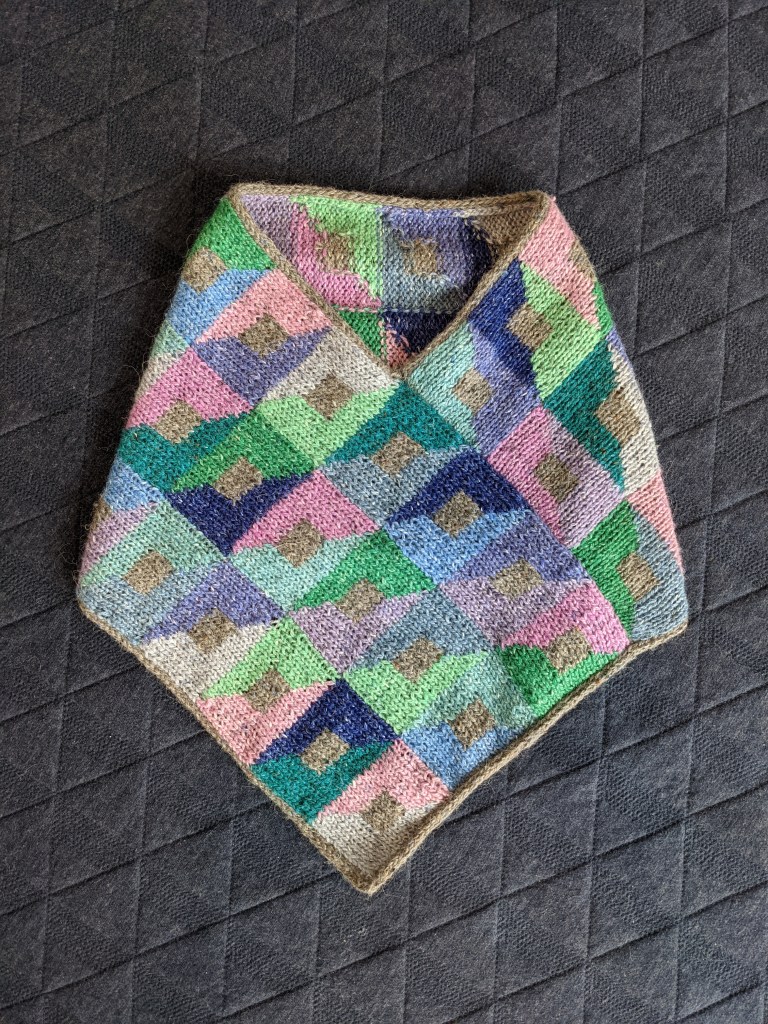
Mini Clerestory Shrug

FINISHED – I am really taken with all five of Jeanette Sloan’s designs in MDK Field Guide No. 15, and I plan to knit them all eventually. I have too many other projects ongoing to start on the Clerestory Shawl yet, but I realized it might be a good pattern to adapt as a quick little shrug for my three year old daughter. It’s a nice way to practice the two lace patterns that make up the shawl. I just finished this, so I didn’t have time yet to write a post or take good pictures, so the above photo shows how it looked after blocking.
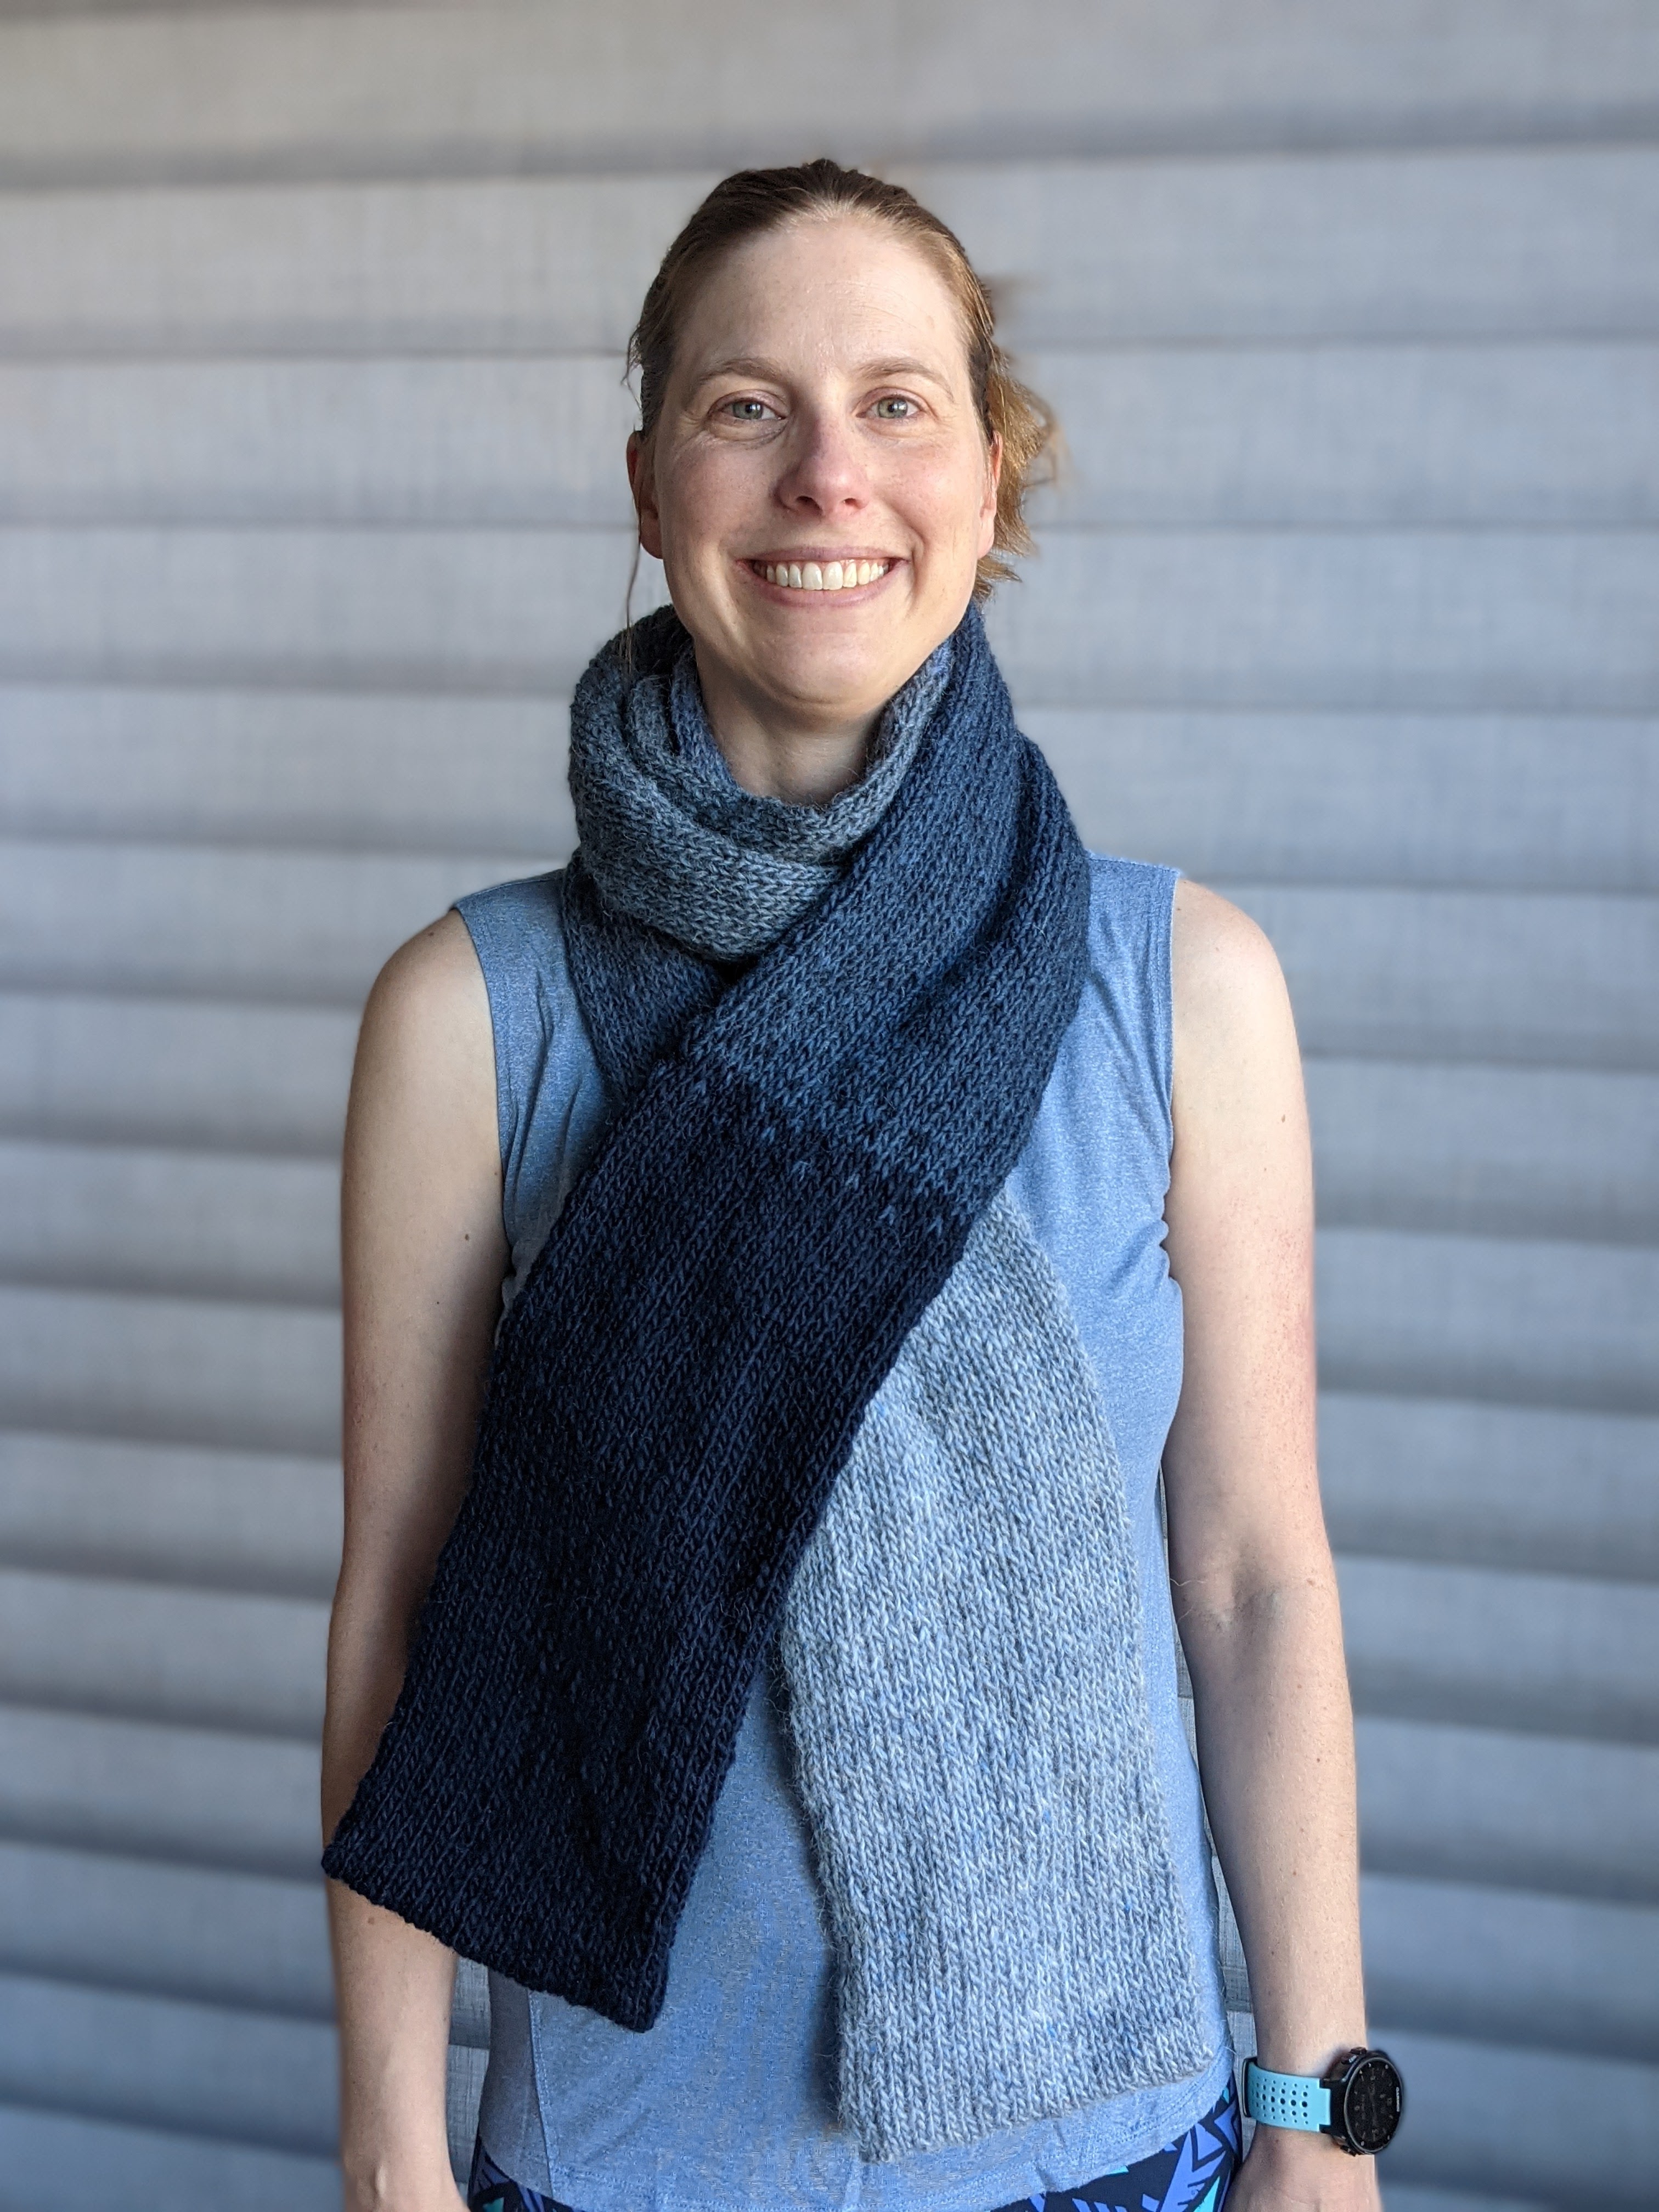
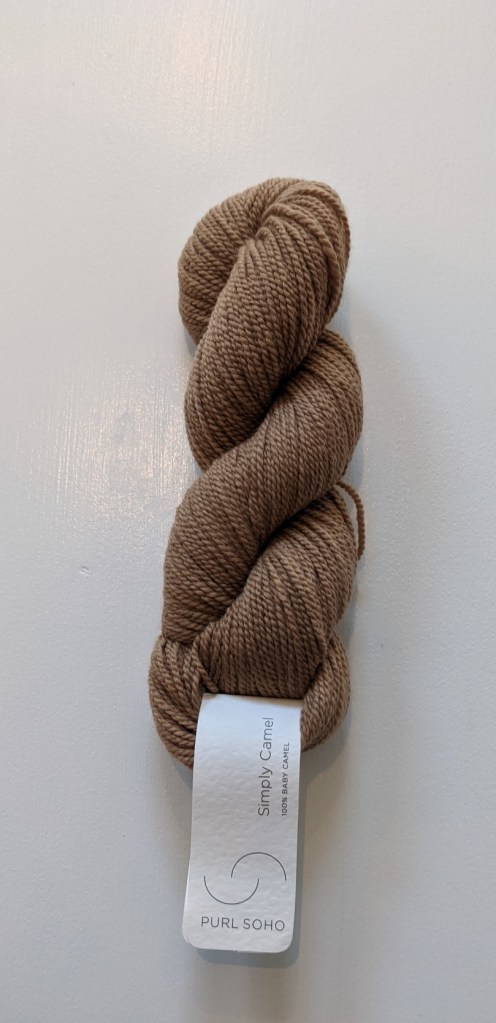
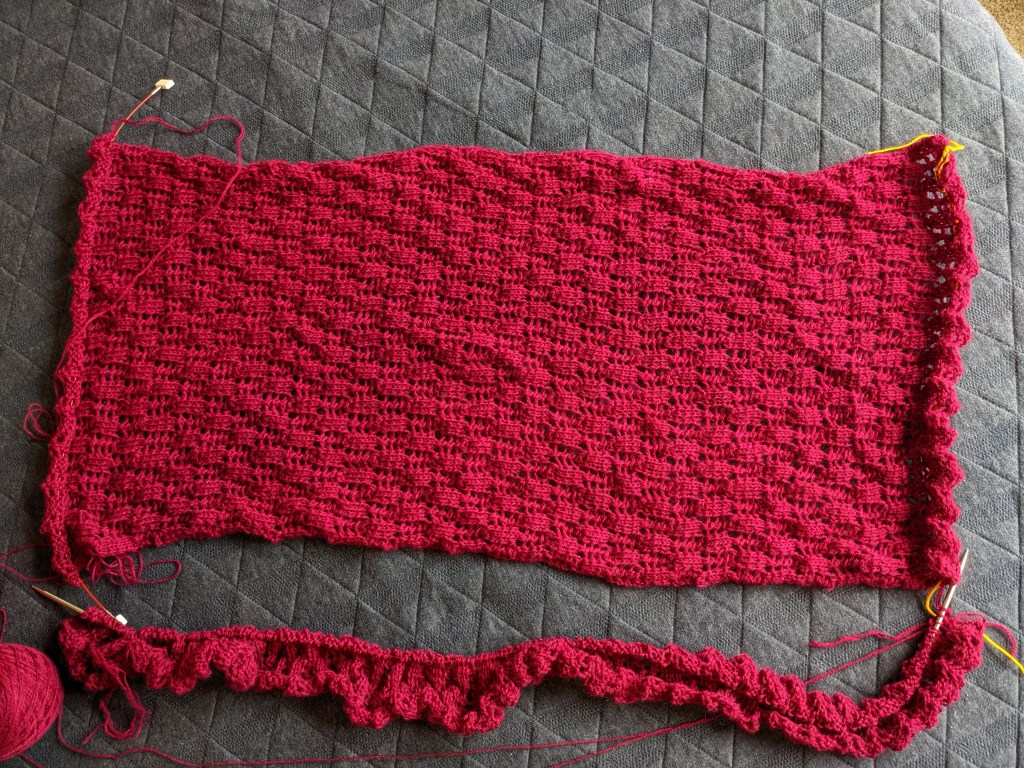
Far Hills Scarf

IN PROGRESS – I got a lot farther with this scarf this month. I’m now over halfway done! I have 3 pattern repeats left to do, then the ribbing and finishing. Here is the pattern on Ravelry.
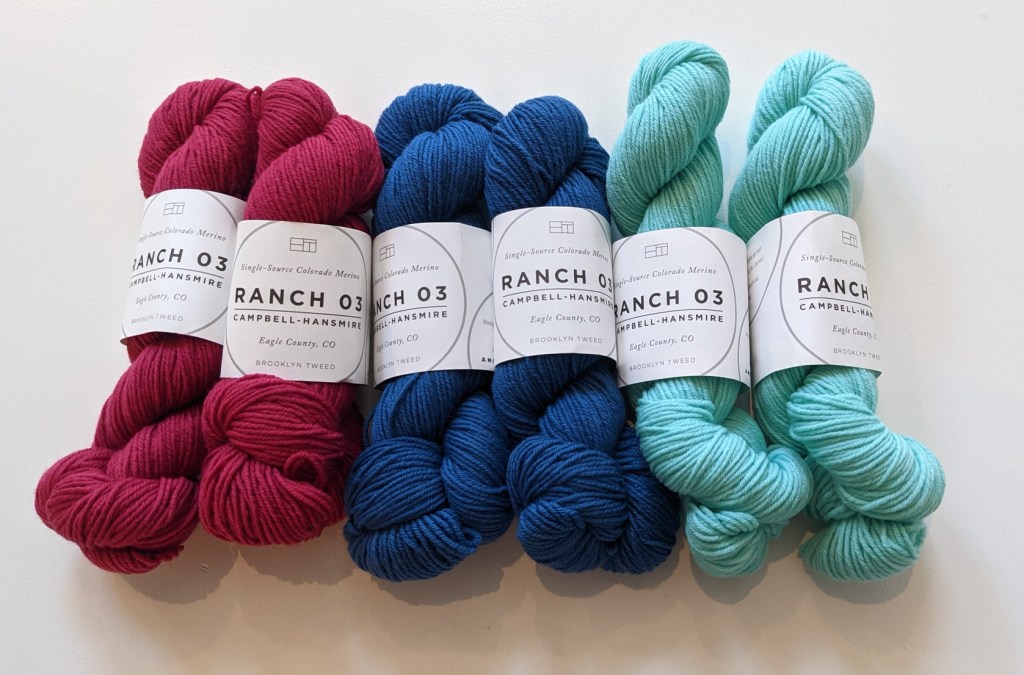
Garter Stripe Shawl

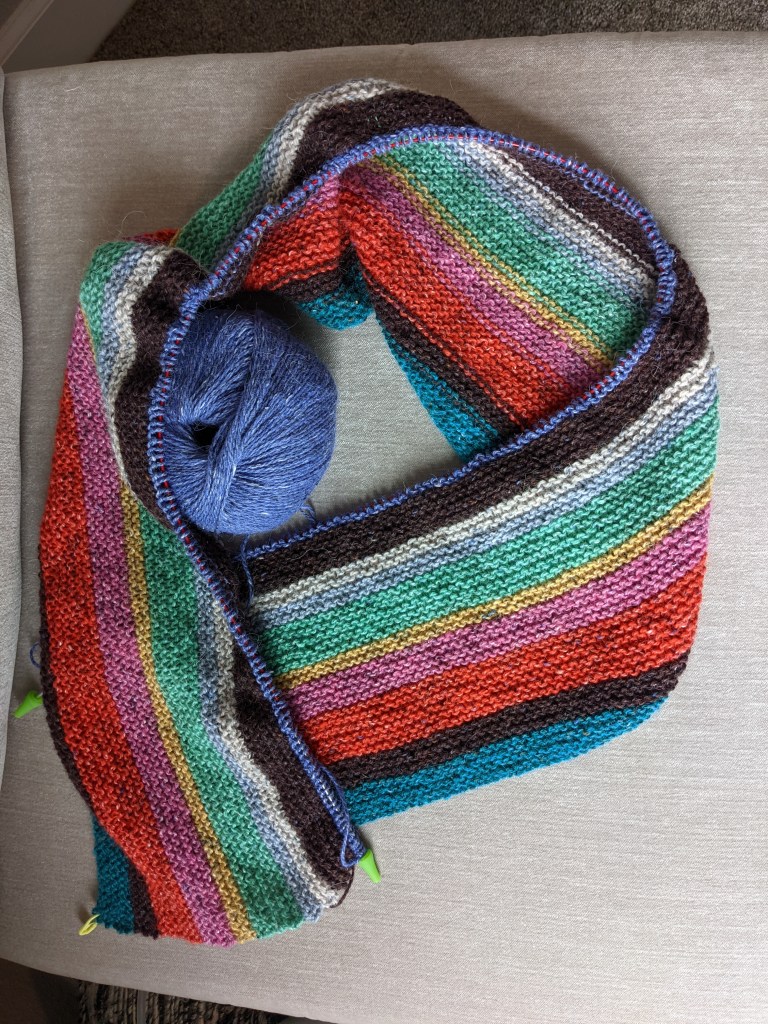
IN PROGRESS – This shawl is really more like a blanket…it will end up being about 3.5 feet wide by 6 feet long! From MDK Field Guide No. 13, it is a glorious meditation on color, designed by Kaffe Fassett and worked in Rowan Felted Tweed. It is going to take a long time to make, and so far I’m about 7% done.

Log Cabin Cloths

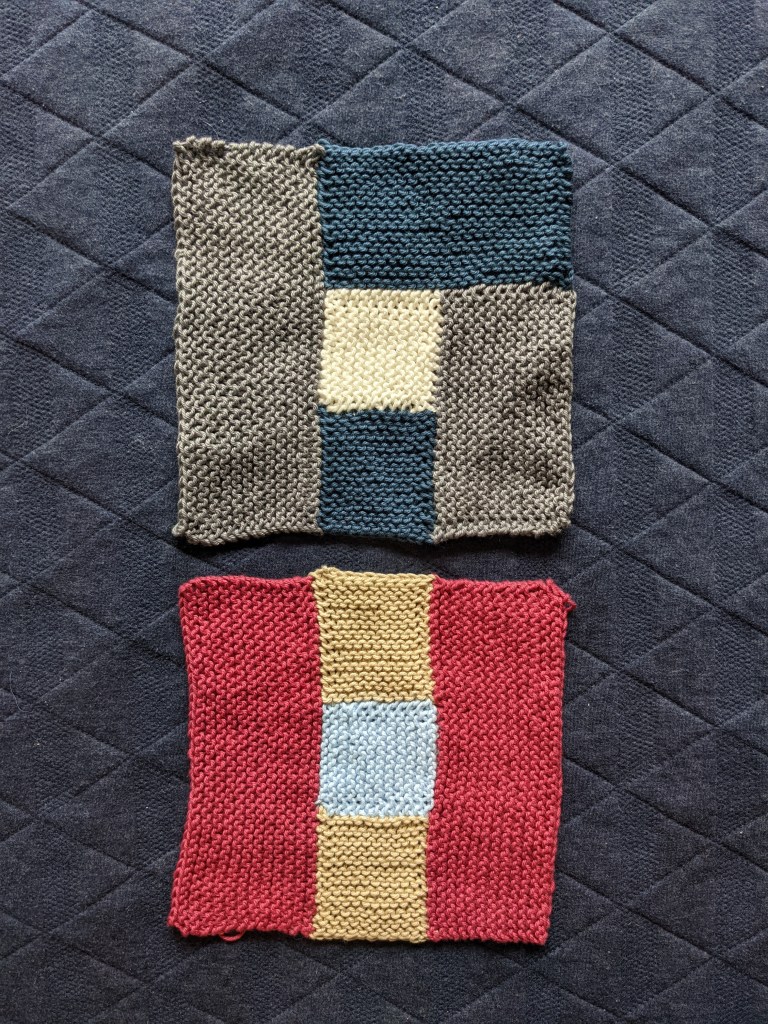
IN PROGRESS – Do you ever feel like you have to knit a certain thing right now and your other projects will justhave to wait? I got that feeling the other day, and dug into my backlog of yarn kits to start on these washcloths. The patterns are from MDK Field Guide No. 4, and the yarn is Rowan Handknit Cotton. These are fun and easy, and get the imagination going. What other combinations of squares and rectangles could I make?

What I’m Working On: April 2021

Most of my knitting time this month was spent on projects in Lettlopi yarn from the Modern Daily Knitting Field Guide No. 17. I really went on a tear, completing 5 projects and starting one more. I find it easy to do a lot of knitting when I love the projects I’m working on! It helps to have a few things going at once so I can switch around what I’m working on, depending on my mood. I also learned that it’s good to have an easy project going – something in simple stockinette or garter stitch – to work on while waiting for things like daycare pickup. I get a lot more knitting done when I can squeeze it into small chunks of time. Let’s see what I got done this month.

Daytripper Cardigan

FINISHED – See my post here. This was a fun, fast, accessible project and I am thrilled with the result. The colors are great, and when I wear it I feel brighter.

Destination Scarf

FINISHED – See my post here. This is a gift for my husband. It turns out he didn’t have a scarf before! Blue is his favorite color, so this will be a good fit for him…next winter. It’s too warm for it right now!

Trinket Mittens

FINISHED – See my post here. I am going to love seeing these pink and black mittens on my hands.

Dalleray Cowl

FINISHED – See my post here. This cabled cowl uses the limited edition Ranch 03 yarn from Brooklyn Tweed.

Swirl Hat

FINISHED – I adapted the Swirl Hat pattern in Field Guide No. 5 for DK weight yarn (Brooklyn Tweed Dapple, a merino/cotton blend) and a smaller finished size so it would fit a preschooler. This meant I cast on only 90 stitches and did fewer pattern repeats. It looks pretty cute!

Far Hills Scarf

IN PROGRESS – This is the only project I started this month that I didn’t finish. I’m making this out of the limited edition Ranch 01 yarn from Brooklyn Tweed, which I managed to get last year before it sold out. It is dyed with natural indigo, so it stains skin, at least while knitting with it. I have to pick times to work on with this yarn when I know I’ll have time to wash my hands really well! I’m about 15% done with this scarf so far. It’s a gorgeous cable pattern that looks great in this yarn.

And that’s a wrap for April! I have a lot of great projects in the pipeline for May. We’ll see if I’m able to keep up this pace!

Daytripper Cardigan

I am very excited to share my latest completed project, the Daytripper Cardigan (pattern on Ravelry, my project on Ravelry). The pattern was released last month as part of the Modern Daily Knitting Field Guide No. 17: Lopi, which focuses on the Icelandic wool yarn Lettlopi. When I received my copy of the Field Guide, I thought all the patterns looked fun, but I was particularly taken with the beautiful yoke of the Daytripper. I quickly chose my Lettlopi colors: Dark Gray for the main color, Heaven Blue Heather for the ribbing, and Ash, Black Heather, Pink Heather, Royal Fuchsia, and Lapis Blue Heather for the remaining contrast colors.

Lettlopi yarn, waiting to be turned into a sweater

The cardigan came together quickly, as advertised. The yarn is worsted weight, but the pattern calls for US 10 needles, a couple sizes larger than would typically be used. This results in a fast knit and a lightweight fabric. My swatch taught me that I needed to use size US 10.5 needles to make gauge. I decided not to increase the needle size for the ribbing, sticking with the pattern-recommended US 9.

Daytripper is worked in the round from the top down. There is a burst of colorwork throughout the yoke, with simple M1 increases embedded in the pattern. There are two sections of short row shaping for the back using the German short row method. I had not used this technique before, but I found it easy to do and I liked the resulting look better than the wrap-and-turn method.

Colorwork yoke is done, ready to divide for sleeves and body

After the yoke is done, the sleeve stitches are held while the body is worked straight in stockinette. This part was really fast for me because it just consisted of knit stitches around until it was long enough. Then there is a short colorwork section to finish off the body. The sleeves are picked up and worked in the round, with simple decrease shaping every couple inches. The sleeves end with a colorwork border to match the body.

Blocking really evens out the stitches

I’ve left out the best detail until now. To turn this into a cardigan, you have to cut a steek! The steek consists of six extra knit stitches in the center front of each round. (See the stitches that look kind of funky in the photo above? That’s the steek section.) The steek stitches need to be secured, which you can do by hand stitching, machine stitching, or the method I used, slip stitch crochet. Then you cut between the two middle steek stitches. I used gray Jamieson & Smith 2-ply jumper weight wool to secure my steek.

Eek! It’s my first steek!

After cutting the steek, the button bands are picked up and worked in 2×2 ribbing. Since the length of the cardigan didn’t exactly match the pattern specification, I made a little 2×2 ribbing swatch to figure out how many stitches to pick up. It needed to be a multiple of 4, so I ended up with 92 stitches, picking up about 7 out of every 8 stitches. I applied 8 buttons, evenly spaced, and used a simple yo, k2tog method for the buttonholes (as specified in the pattern).

Picking up for the buttonhole band

After the button bands were done, all that was left was to sew on the buttons and sew down the steek edge. I used some rustic-looking buttons that I found at Michael’s.

It’s finished!

I’m really happy with how this turned out. I’ve worn it a couple times already, and it is cozy and hardy without being too heavy. I highly recommend this pattern for your first steek, first colorwork circular yoke, and first project with Lettlopi yarn. I love how easy it is to customize the colors of this pattern; I can imagine making several more as gifts!

I’m a happy Daytripper owner

What I’m Working On: March 2021

Watercolor Cowl

FINISHED – I used some of the Rowan Felted Tweed I had leftover from my Cityscape Scarf to make a Watercolor Cowl (my Ravelry project). I had 13 colors, so I used one for the center squares and the edging, and the other 12 for the large squares. I didn’t follow a predetermined color ordering, but I made sure to use each of the 12 colors in every two pattern repeats. I also made sure to only use each pairing of colors once, so every square is unique.

The construction of this cowl is simple but effective. It is knit as a long rectangle, then the cast on edge is sewed onto the side. This results in a pretty point in front and not too much bulk in the back. It kind of looks like a bandanna. The edging is worked in applied I-cord around the top and bottom circumferences. It really ties the whole look together!

Novae Hat and Mittens

FINISHED – See my post about Quince Quarterly Winter 2021.

Daytripper Cardigan

IN PROGRESS – This one is so much fun! It is part of the Modern Daily Knitting Field Guide 17: Lopi, which is full of designs using the Icelandic yarn Lettlopi. I am late to the party and had never heard of this yarn, but I love it. It is very sturdy and it comes in lots of gorgeous colors. The Daytripper Cardigan uses 7 colors in a stranded colorwork circular yoke and a steek for the front opening. A big part of the fun is deciding what colors to use and in which order. MDK shared a coloring template that I used to try out several combinations. Here is the one I settled on (left half of the sketch).

And here is what it looks like so far! I’m done with the colorwork yoke and just divided the sleeves and body. You can see the steek stitches in the middle; these will be hidden by the button band.

Yarn Purchases

I have been letting myself buy any yarn I want lately. Part of me is planning ahead for all the things I want to make, and part of me doesn’t want to miss out on limited edition yarns. Plus, the sentiment on my new favorite shirt really says it all 😆.

In particular, I’ve decided that I want to try all the yarns Brooklyn Tweed has ever produced. I’ve been a fan since they came out with their first yarn, the worsted weight Shelter. Now they have something like six core yarns, and continue to produce special limited runs of new yarns every year or so. They just released their latest, Ranch 03, a sport weight merino from a ranch in Colorado, which comes in some amazing bright colors. I ordered two skeins each of three colors: Sorbet, Fathom, and Reef (left to right in picture below).

The first limited edition yarn Brooklyn Tweed made, a few years ago, was the lace weight Plains. It has been sold out for a while. I realized in order to meet my goal I would need to find it somewhere, so I found a yarn store online that still had a few skeins in stock and ordered them right away. I think I’ll use them for one of the patterns that was designed specifically for Plains when it was released.

Finally, I saw that Purl Soho had released a brand new baby camel yarn, Simply Camel. It looked interesting so I scooped up one skein. Good thing, since it’s out of stock now! This will just be enough to make a hat or some hand warmers. I love the natural warm caramel color, and it’s very soft.

Baby Cardigan

Update! I found some football-shaped buttons that I had bought for this project a couple years ago, so I decided to replace the plain white buttons.

Cardigan with football buttons

In November I made a cute little cardigan (Ravelry) for the new baby, using the Fuss Free Baby Cardigan pattern by Louise Tilbrook. I got 95% done with one of these for the first baby in 2018 and never quite finished…oops! I had quite a few other things on my mind that year, and knitting was not a big priority then. I also made one as a gift several years ago.

This time, I wanted to chronicle all the modifications I made to the original pattern. The pattern is great as written, and it includes a few suggestions for customization that are easy to expand upon.

Unfortunately, I can’t figure out what yarn I used. I bought it and wound it in 2018, when I originally intended to make this sweater, and lost track of the ball bands. I know it is a wool DK weight yarn, and I used a US 6 needle to get 5.5 stitches per inch gauge.

Cardigan with original buttons

Modifications

  1. Instead of starting with the garter stitch border, I started at the beginning of the stockinette section at the top. This allowed me to pick up and knit the garter stitch border after the body was done, making the top, bottom, and sides as one piece.
  2. For the raglan increases, I used M1 instead of KFB. Specifically, I did: knit to one stitch before marker, M1R, K1, sl marker, K1, M1L. This makes a double column of knit stitches in between the increases.
  3. I alternated colors as follows to create the stripes: *6 rows orange, 2 rows blue, 2 rows white, 2 rows blue, repeat from *.
  4. After completing the stockinette body, I picked up stitches on the left, right, and top (in addition to the bottom stitches that were still live). Then I joined in the round to work the garter stitch border as one piece. I did 8 rounds of garter stitch (knit one round, purl one round) and increased 2 stitches at each corner on every RS (knit) round to help the border lie flat.
  5. I wanted to make long sleeves in the stripe pattern without working in the round so I could avoid jogs in the stripes without any special techniques. For each sleeve, I did the following while maintaining the stripe pattern to match the body: Row 1: Starting from right edge of held stitches, pick up and knit 2, knit held stitches, pick up and knit 2. Row 2: sl1, purl to end. Row 3: sl1, knit to end. Row 4: repeat Row 2. Row 5 (decrease row): sl 1, k1, k2tog, k to last 4 sts, ssk, k2. Continue in stockinette st, working decrease row every 4th row (rows 9, 13, 17, 21) and slipping first stitch of each row. Rows 23-28: work even in stockinette, slipping the first st of each row. Switch to blue and knit one row. Seam together the two edges, then join in the round and continue to work garter stitch for 5 more rounds. BO all stitches.

I really like how this turned out and can’t wait for my little one to start wearing it!

Reine Cardigan

To go along with my stash challenge, a mini-resolution I have for myself this year is to actually finish my projects. I know, what a revolutionary idea! I have this problem where I LOVE to start new projects, to learn new stitches and techniques, and generally spend a lot of time knitting. But when it comes time to put the finishing touches on, my interest plummets. I just do not find it very fun to weave in ends, seam pieces together, block, or sew on buttons. These things are crucial, though! Blocking is critical for determining the final shape and size and for getting the fabric to lay correctly. Seams and buttons can add a great degree of visual interest, in addition to their obvious functions. So it’s time for me to get over my aversion to finishing.

Today I am happy to report that I have a finished cardigan to share with you. All of the knitting for this piece took place in 2014 – in fact, it has been about a year since I started the project. As usual, I procrastinated the less fun parts, which included sewing on pockets and buttons. But I felt a huge sense of accomplishment yesterday as I sewed on the last button.

_MG_4556

The pattern for this cardigan is Reine by Alexis Winslow, from the Brooklyn Tweed collection Wool People 3. (By the way, have I mentioned how much I love Brooklyn Tweed’s patterns? Always so good.) I was struck by the details of the design – particularly the garter stitch accents on the shoulders, sleeves, and hem, and the double-sided cable that lines the front edge, collar, and pockets. I used a soft lavender alpaca yarn – Galler Yarns Prime Alpaca Heathers.

_MG_4561

Garter stitch accents

I always like to learn new techniques, and this project gave me a few opportunities to do so. First, the double-sided cable was a fun change from the standard cables I’ve been accustomed to, and it’s pretty easy. Rather than knitting all the stitches in the cable section with cable twists every 6th row, you work 1×1 rib with cable twists every 6th row. The ribbing naturally contracts to appear like a normal cable on each side, which makes a great look for edging.

_MG_4559

Double-sided cables and pockets

I learned how to sew on pockets using mattress stitch, which makes the knitting look nearly continuous. For pockets, the seam is a bit obvious because of the extra bulk from the edge of the pocket that gets trapped in the seaming operation. I think I did a pretty good job of making the two pockets symmetric and secure. This was also my first project with full-length arms, so I was pleased that they look pretty good and seem to be the same length (whew!).

The last new technique I learned was sewing buttons on with backing buttons. This one kind of blew my mind. Essentially, if you sew single buttons to a knit piece, they can pull on the fabric and cause it to deform and droop. Backing buttons are tiny buttons that go on the inside of the piece at the same place as the functional buttons. You simultaneously stitch the two buttons on, sandwiching the knit fabric in between. The two buttons hold firmly against each other so the knit fabric doesn’t get pulled at all. It seems to be easiest if the buttons have the same number of holes. I chose decorative pearlescent buttons for the front, and simple two-hole white buttons for the backing. I was really pleased with how this finishing detail turned out – no drooping fabric here!

_MG_4565

Backing buttons

Overall, I am happy with the finished product. There are a couple things I would do differently in the future, though. My row gauge always tends to be a bit different than the pattern calls for, so I have to improvise to get the right size. In this case, the garter ridge details at the top ended up being a little higher up than I would have liked, so I would shift them down. It was hard to tell while knitting. The sleeves are a little tighter than I expected, so I would consider adding a few stitches in the upper arm. And finally, I think I would sew the pockets a little farther out from the center – but I’m not going to rip them out and try again! I will enjoy wearing this soft, beautiful cardigan throughout the spring.

_MG_4558

Loving my new cardigan!