Juris Mittens and Thoreau Hat

Today’s post features two accessories I made for my husband. The first one is an example of my bad habit of taking a long time to finish a project. In this case, I did all the knitting for the mittens pretty quickly, but didn’t quite have time to purchase and sew on buttons before Christmas, so I gave them to him with the promise “you can pick the buttons!” That turned into months and months of waiting, until we bought two different types of buttons 11 months later. So then he got them for Christmas that year…not! Since there were two choices for the buttons, neither of us could decide which ones to use. It took another ENTIRE year until I finally sewed on the dang buttons, which took all of 20 minutes. So two years later, he actually got to wear his mittens in December 2014. That is epic procrastination, and I’m not proud of it.

_MG_4615

A happy husband

Fortunately, the hat was finished much more quickly. I started it in December 2014 and finished it just a couple weeks later in January. This is probably more a function of hats being easier for me to finish than other items, but I’m hopeful that I’m turning the corner on finishing what I start.

The yarn I chose for these two items is Debbie Bliss Donegal Luxury Tweed Aran, a wool/angora blend, in a soft blue with bits of white and brown. One ball can easily make a hat, while it took about one and a half balls for the mittens. Both of the patterns come from the Interweave Knits Accessories 2011 magazine, which I’ve mentioned before.

_MG_4617

Juris Mittens

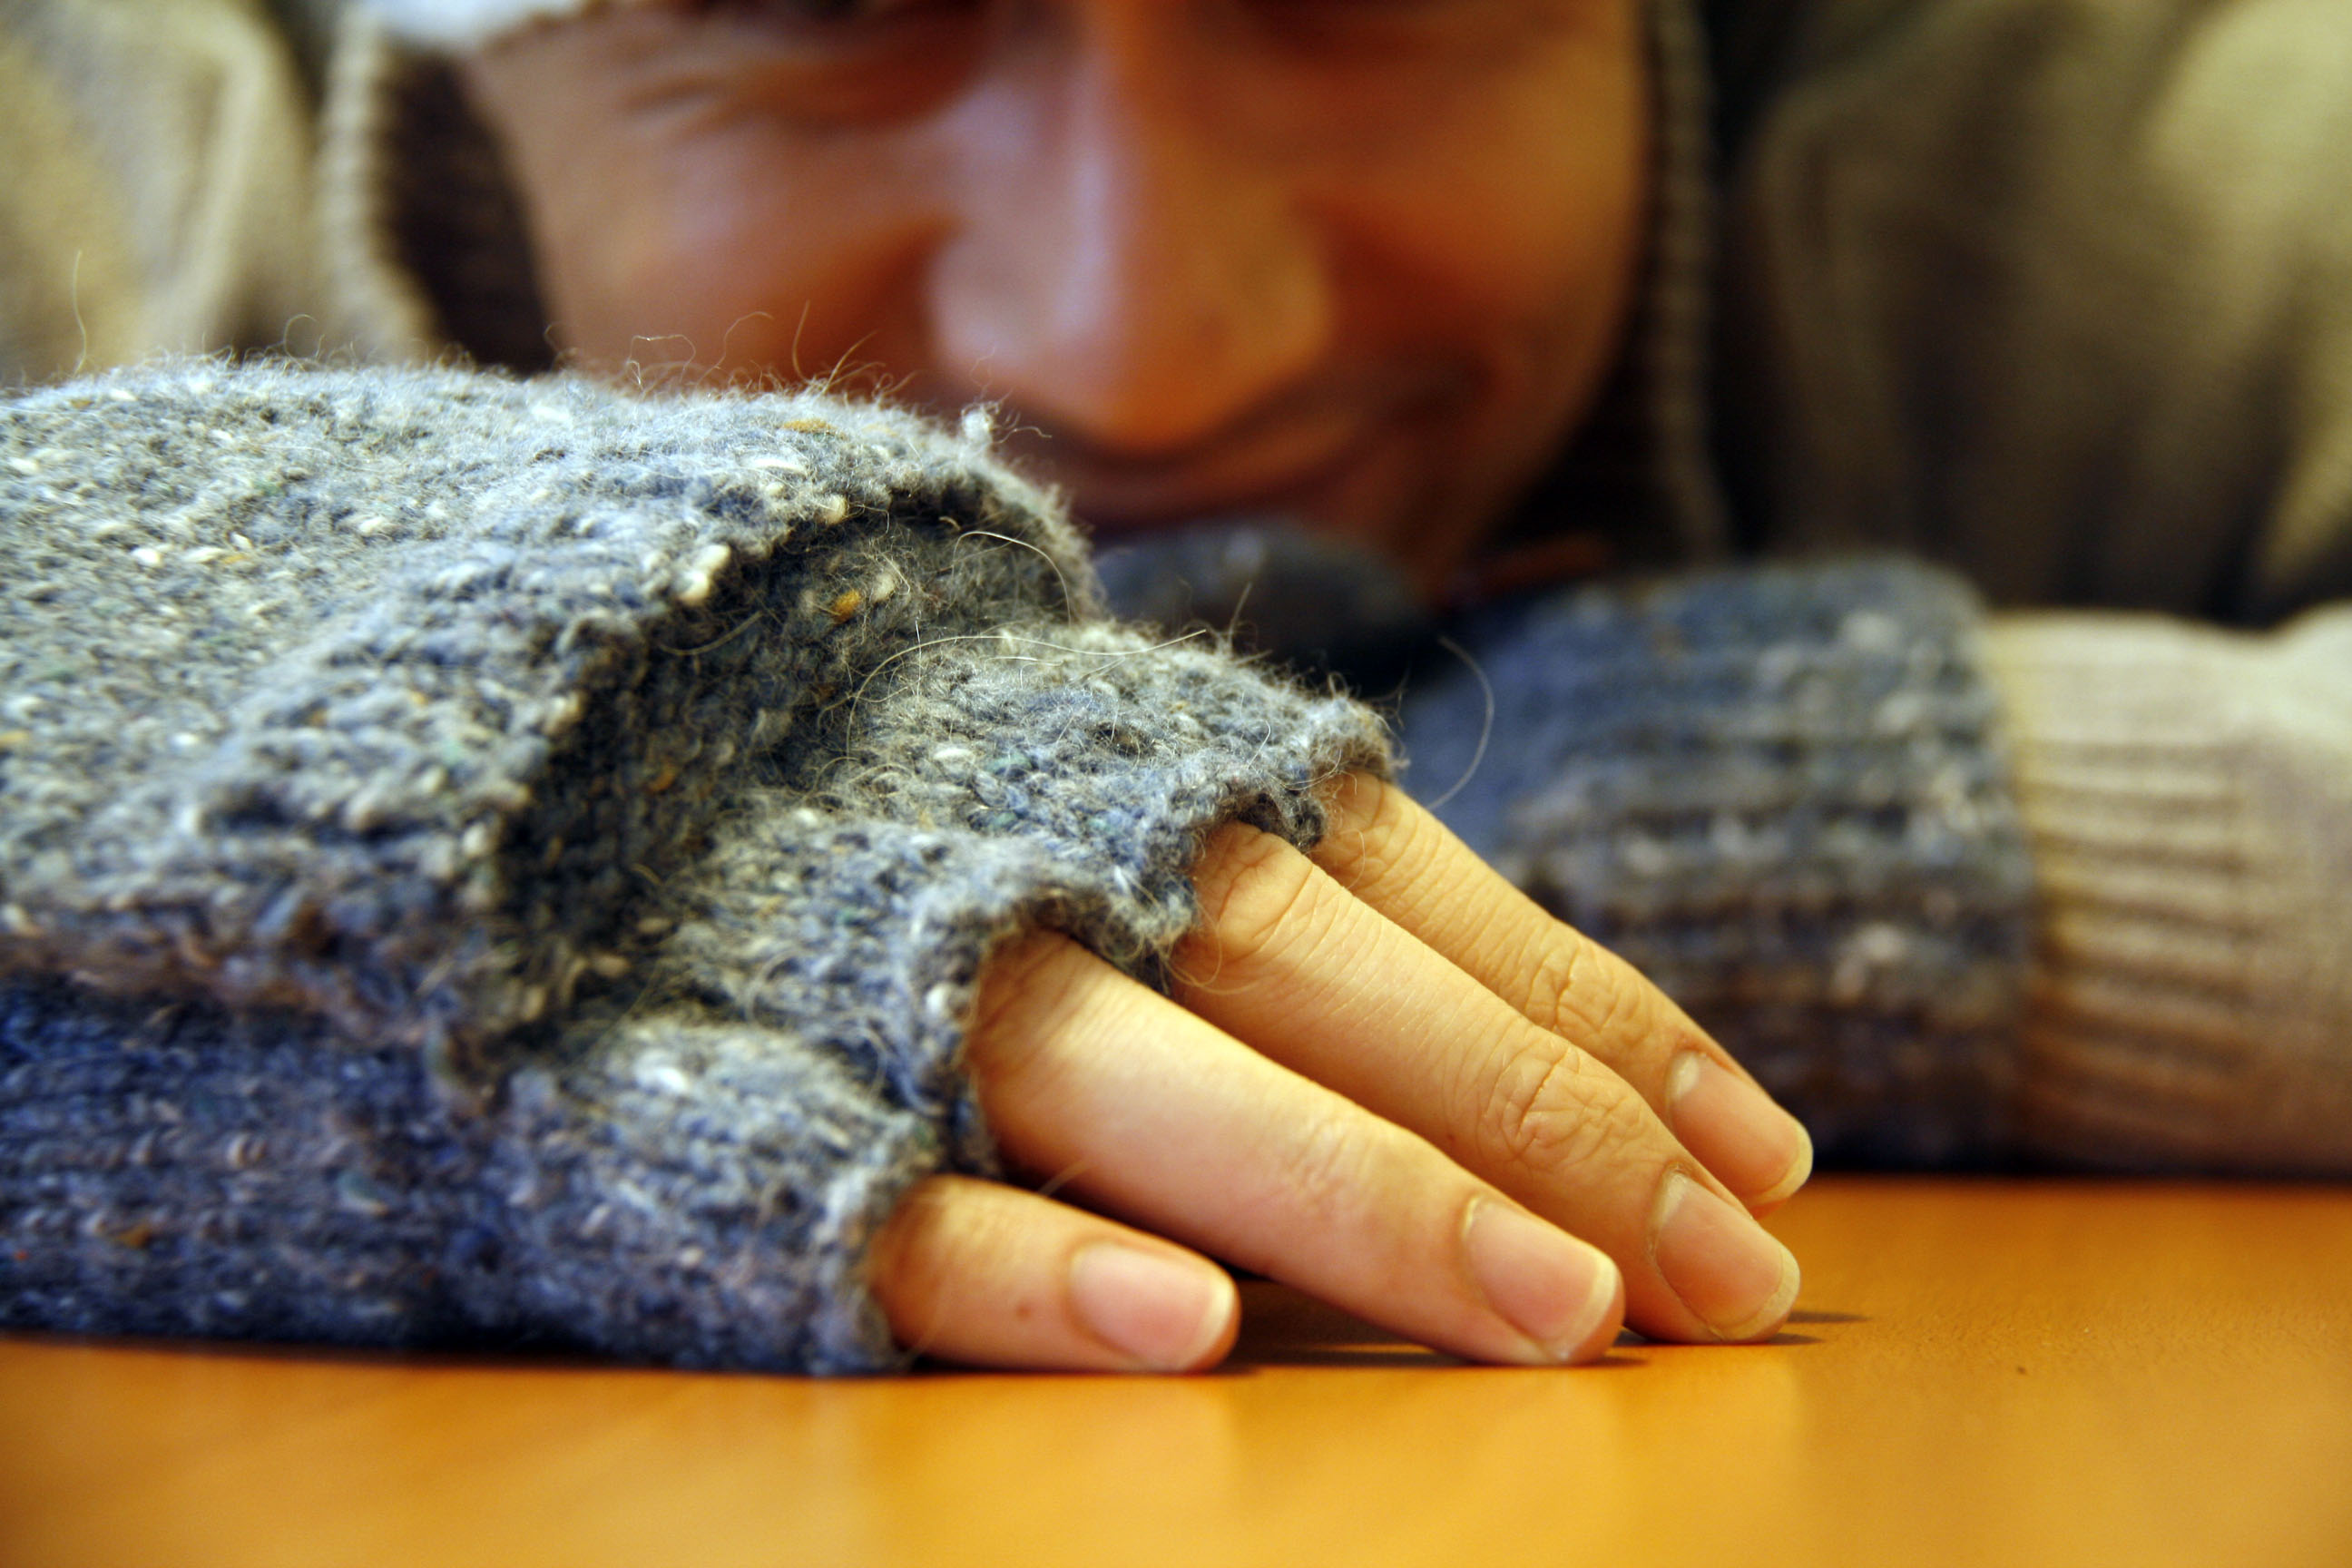
The Juris Mittens, by Alexis Winslow, combine fingerless gloves with a mitten flap in a classic tweed. They are constructed from the cuff up, knitting the fingerless gloves first. Then the mitten flap is made by picking up stitches along the back of the hand, then knitting in the round. The gauge is fairly tight to keep the hands nicely insulated. These mittens were my first project involving individual fingers, and I was pleased that it wasn’t much harder than making a thumb, it just took more time to make them all. I followed the pattern pretty much exactly, and I really liked the results.

_MG_4614

Juris Gloves!

I took a bit more liberty with the Thoreau Hat, by Terri Kruse. This hat begins with twisted 1×1 ribbing, then moves into stockinette with a single detail panel consisting of ribbing and a 3-stitch mock cable. I liked the overall look of the hat, but as I soon as I started working the 3-stitch mock cable, I realized I would prefer to do a real cable. So I made one up – I had never seen a 3-stitch cable before. My method was the following:  sl2 to cable needle and hold in front, K1, sl2 back to left needle from cable needle, sl1 to cable needle and hold in front, K1, K1 from cable needle. This basically resulted in knitting the 3 stitches in reverse order from left to right.

_MG_4611

Thoreau Hat with custom cable

Together, these two accessories are perfect to keep my husband warm throughout the winter. Although the hat wasn’t quite finished in time, he was able to wear the mittens during our trip to London and Paris in December. The combo gloves/mittens were just right to keep his hands warm while taking lots of photos of the cities!

_MG_4624

Reine Cardigan

To go along with my stash challenge, a mini-resolution I have for myself this year is to actually finish my projects. I know, what a revolutionary idea! I have this problem where I LOVE to start new projects, to learn new stitches and techniques, and generally spend a lot of time knitting. But when it comes time to put the finishing touches on, my interest plummets. I just do not find it very fun to weave in ends, seam pieces together, block, or sew on buttons. These things are crucial, though! Blocking is critical for determining the final shape and size and for getting the fabric to lay correctly. Seams and buttons can add a great degree of visual interest, in addition to their obvious functions. So it’s time for me to get over my aversion to finishing.

Today I am happy to report that I have a finished cardigan to share with you. All of the knitting for this piece took place in 2014 – in fact, it has been about a year since I started the project. As usual, I procrastinated the less fun parts, which included sewing on pockets and buttons. But I felt a huge sense of accomplishment yesterday as I sewed on the last button.

_MG_4556

The pattern for this cardigan is Reine by Alexis Winslow, from the Brooklyn Tweed collection Wool People 3. (By the way, have I mentioned how much I love Brooklyn Tweed’s patterns? Always so good.) I was struck by the details of the design – particularly the garter stitch accents on the shoulders, sleeves, and hem, and the double-sided cable that lines the front edge, collar, and pockets. I used a soft lavender alpaca yarn – Galler Yarns Prime Alpaca Heathers.

_MG_4561

Garter stitch accents

I always like to learn new techniques, and this project gave me a few opportunities to do so. First, the double-sided cable was a fun change from the standard cables I’ve been accustomed to, and it’s pretty easy. Rather than knitting all the stitches in the cable section with cable twists every 6th row, you work 1×1 rib with cable twists every 6th row. The ribbing naturally contracts to appear like a normal cable on each side, which makes a great look for edging.

_MG_4559

Double-sided cables and pockets

I learned how to sew on pockets using mattress stitch, which makes the knitting look nearly continuous. For pockets, the seam is a bit obvious because of the extra bulk from the edge of the pocket that gets trapped in the seaming operation. I think I did a pretty good job of making the two pockets symmetric and secure. This was also my first project with full-length arms, so I was pleased that they look pretty good and seem to be the same length (whew!).

The last new technique I learned was sewing buttons on with backing buttons. This one kind of blew my mind. Essentially, if you sew single buttons to a knit piece, they can pull on the fabric and cause it to deform and droop. Backing buttons are tiny buttons that go on the inside of the piece at the same place as the functional buttons. You simultaneously stitch the two buttons on, sandwiching the knit fabric in between. The two buttons hold firmly against each other so the knit fabric doesn’t get pulled at all. It seems to be easiest if the buttons have the same number of holes. I chose decorative pearlescent buttons for the front, and simple two-hole white buttons for the backing. I was really pleased with how this finishing detail turned out – no drooping fabric here!

_MG_4565

Backing buttons

Overall, I am happy with the finished product. There are a couple things I would do differently in the future, though. My row gauge always tends to be a bit different than the pattern calls for, so I have to improvise to get the right size. In this case, the garter ridge details at the top ended up being a little higher up than I would have liked, so I would shift them down. It was hard to tell while knitting. The sleeves are a little tighter than I expected, so I would consider adding a few stitches in the upper arm. And finally, I think I would sew the pockets a little farther out from the center – but I’m not going to rip them out and try again! I will enjoy wearing this soft, beautiful cardigan throughout the spring.

_MG_4558

Loving my new cardigan!

Past Projects – Wedding Shawl

Happy first day of February! I can’t believe January is already over…I have not done as much knitting as I would have liked! One reason for this is that I have a small injury to my left hand. I don’t think it’s too serious, but there’s a little bit of nerve damage so I’m being really careful and taking it easy while rehabbing. Unfortunately, this means I probably won’t be knitting for at least a few weeks, which really puts a damper on my stash challenge progress for now.

In the meantime, I’ll be writing about some projects I have completed in the past, along with some other crafty things. Today’s post features the lace shawl I knit for my wedding in 2012.

Photo credit Eli Pitta

Photo credit:  Eli Pitta

For this shawl, I tried lace knitting for the first time. Lace knitting  is characterized by intricate designs with holes and shaping, and typically uses small needles and fine thread to create delicate pieces. Unlike a lot of the other projects I do, this one required me to pay very close attention to every stitch. It’s easy to make mistakes in knitting in general, but even more so with lace. Plus it’s harder to correct mistakes when the pattern involves many yarn overs and decreases as lace typically does.

Photo credit:  Eli Pitta

Photo credit: Eli Pitta

The shawl pattern comes from the Interweave Knits Accessories 2011 magazine. (This is a great issue! I have made several items from patterns in it, so it was well worth the $15 it set me back.) The pattern is called Trousseau Wrap and was designed by Miriam L. Felton. The Interweave Accessories issue has several beautiful wedding shawls, but this one really jumped out at me as something I had to make for myself. I love how the points on the ends of the shawl make a bold statement, while the ring pattern in the shawl body is intricate and timeless. For my shawl, I used Lorna’s Laces Helen’s Lace yarn in red for a pop of color.

Photo credit:  Eli Pitta

Photo credit: Eli Pitta

The construction technique for the shawl was new to me. First, one end is knit side-to-side to create the four points. Next, stitches are picked up along the edge and the piece is worked from bottom to top to create the body of the shawl, with stitches held provisionally once the desired length is reached. Stitches are cast on for the second end, which is knit from side to side again. At the end of each WS row, the last stitch is knit together with a held stitch from the body. I thought this was a really cool way to keep the shawl as all one piece, yet allow for the knitting direction to change in the different parts of the shawl.

Photo credit:  Eli Pitta

Photo credit: Eli Pitta

The hardest part of making this shawl was carefully manipulating the fine yarn, particularly because the pattern has many K3tog stitches in every other row. Once I got the hang of it, I enjoyed the detailed work and it was fun to spend my time making something so beautiful. It did take a long time though – I started in April 2012 and finished just a couple days before my wedding at the end of August 2012, so about 4 months! It ended up being just the perfect accessory to wear during my wedding, and I really enjoyed creating something unique and personal for this special occasion.